Ampache transforms your homelab server into a personal media jukebox for both audio and video. With Ampache, you can effortlessly organize your files, build and manage playlists, view album art, and fine-tune transcoding options to ensure smooth playback on any device. It keeps your content secure and private without requiring expensive or unreliable cloud services.
Features
- Web-based interface that is easy and intuitive to navigate
- Supports nearly every audio and video format
- Streams to multiple devices simultaneously
- Provides all features related to media library management
- Offers a built-in transcoding feature
- Allows easy customization and the addition of new themes
- Ensures secure remote access to your media library
- Supports multiple users with specified preference options
- Automatically fetches artwork, track information, and movie details, creating a visually appealing and information-rich library
Installation
Setting up Ampache on your homelab server is straightforward, especially when using Docker. Ensure that Docker and Docker Compose are installed.
First, create the directory that will store your Ampache data and media:
mkdir ampache
cd ampache
Create a docker-compose.yml file using nano:
nano docker-compose.ymlAmpache provides a docker-compose.yml file in its GitHub repository. You can grab the file content and paste it into your Ampache docker-compose.yml file.
services:
  ampache:
    image: ampache/ampache:latest
    container_name: ampache
    restart: unless-stopped
    ports:
      - 80:80
    volumes:
      - ./data/config:/var/www/config
      - ./data/log:/var/log/ampache
      - ./data/media:/media
      - ./data/mysql:/var/lib/mysql
    environment:
      DISABLE_INOTIFYWAIT_CLEAN: ${DISABLE_INOTIFYWAIT_CLEAN-0}
Here, the ports is mapped to port 80 on your server to Ampache’s web interface. You can choose a different port, such as 8080 instead of 80, to avoid potential conflicts with other web services running on your system. You can adjust this to any available port.
To keep your data persistent, Ampache automatically creates a few directories, such as media for mounting audio and video files, mysql for storing persistent MySQL data, and config and log directories. However, make sure that the Ampache configuration and log directories are readable and writable by the current user. You can set the correct permissions by executing these commands:
sudo chown 33:33 ./data/config -R
sudo chown 33:33 ./data/log
One more things, if you’re using a network mount or external storage that might occasionally disconnect, you may want to disable the inotifywait clean functionality by setting the environment variable DISABLE_INOTIFYWAIT_CLEAN to ‘1’ in your Docker Compose file. This prevents Ampache from removing files from its database if the storage temporarily becomes unavailable.
Finally, start your Ampache container:
docker-compose up -dSetting up Ampache
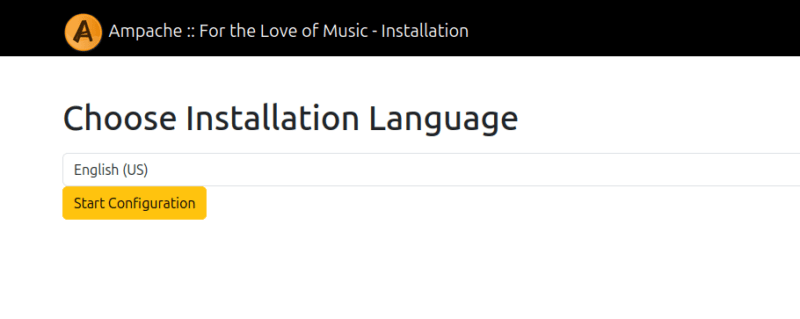
If your Ampache container is successfully running, open a web browser and navigate to your server’s IP address or hostname with the port you specified (e.g., http://your-server-ip:80). You’ll be greeted by Ampache’s setup wizard.
Start the Configuration by clicking on Start Configuration.
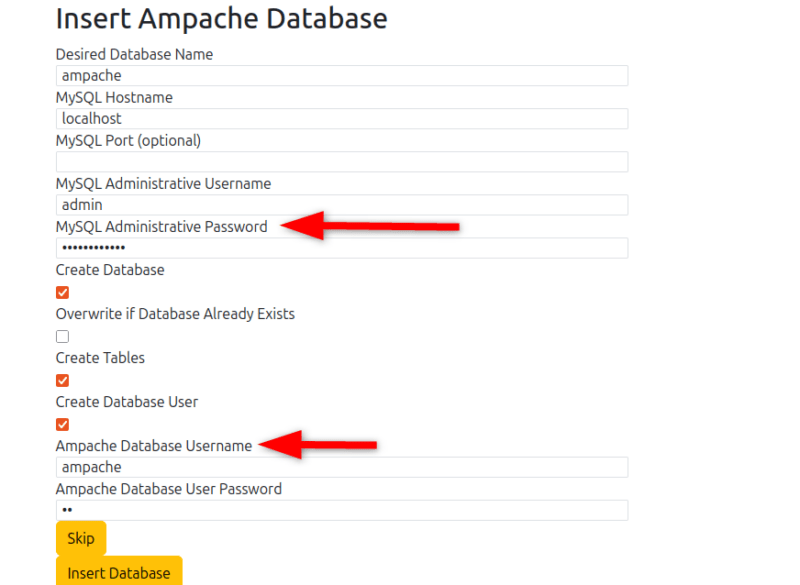
You’ll be prompted to enter database details, such as the password and username, on the Insert Ampache Database page. For “MySQL Administrative Username,” enter admin, and for “MySQL Administrative Password,” check your container logs to find the automatically generated password.
You can view the logs with:
docker-compose logs ampache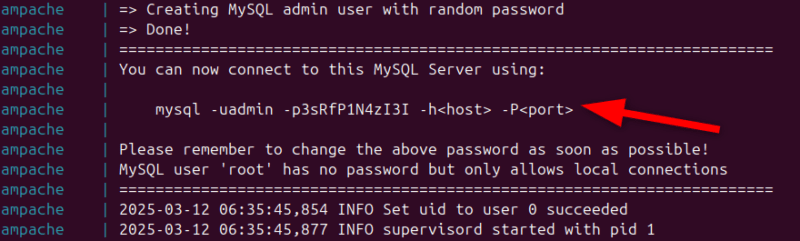
Look for a line like, mysql -uadmin -p <password>, where the password is everything after “-p.”
Next, check Create Database User and enter a password of your choice for “Ampache Database User Password.” After entering the details, click on Insert Database.
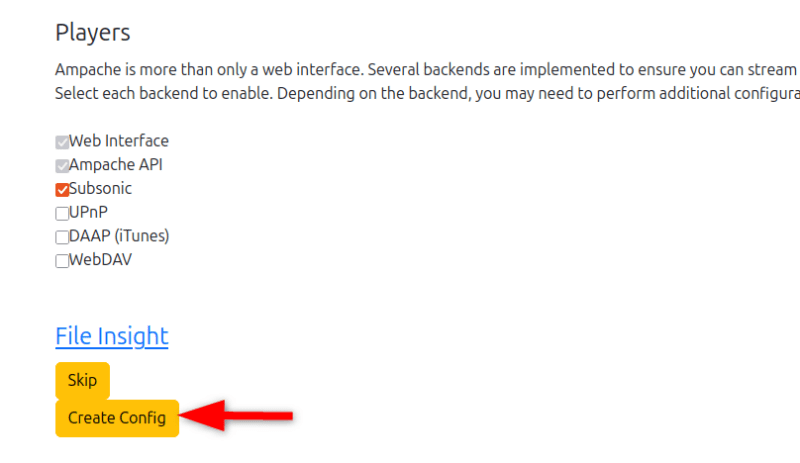
Then, generate a configuration file by clicking on Create Config.
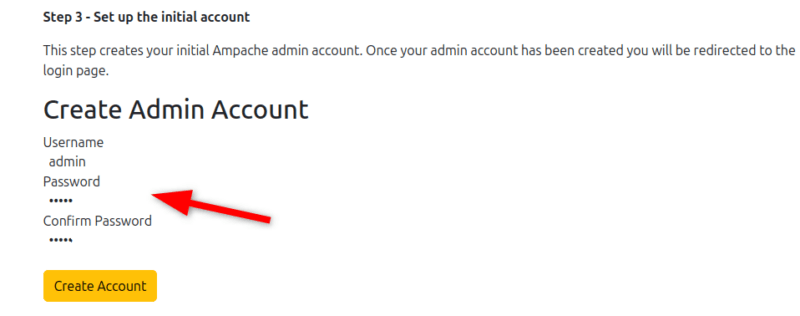
Next, type the username and password you want for your Ampache admin account, then click Create Account.
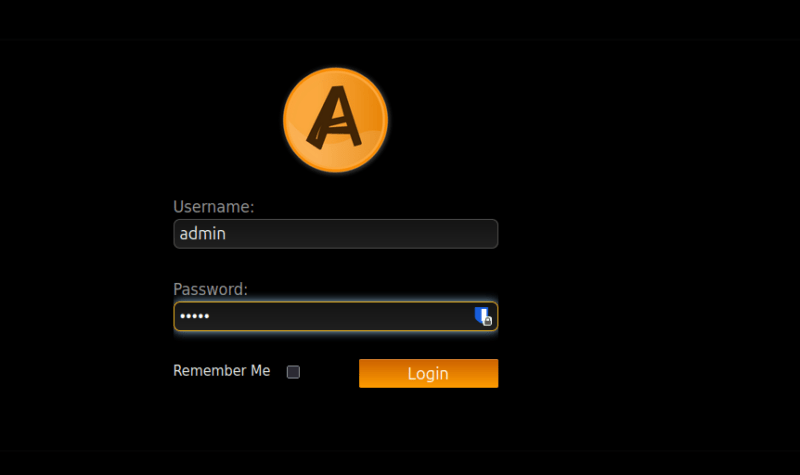
Finally, log in using your new admin credentials.
Usage
When you log into Ampache, you’ll see a simple, easy-to-use dashboard. The design is intuitive – everything from searching your library to creating playlists is just a click away.
To begin enjoying your media, you need to upload your files. Simply copy your music and video files into the “/media” directory (or the local directory you mounted as /media when setting up Docker).
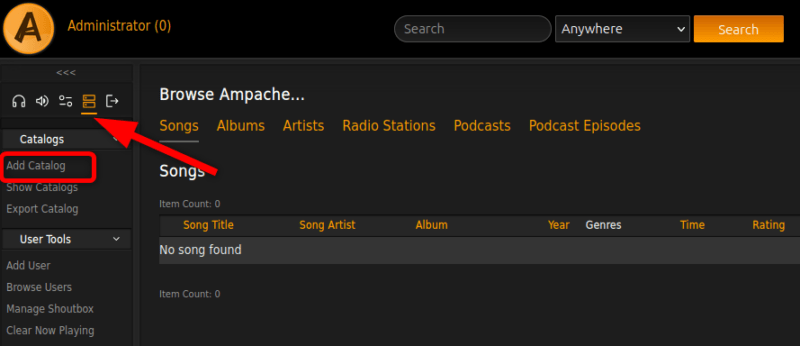
Next, set up a catalog to tell Ampache where to locate your media files. To do this, go to Admin, then Catalogs and click on Add Catalog.
Within the catalog settings, select the catalog type (e.g., Local for music files stored on the server). Enter a name for your catalog (something descriptive like “My Music Collection”), and for the Path, enter /media (this is where your media directory is mounted inside the container). Set up any other settings as needed, then click Add Catalog.
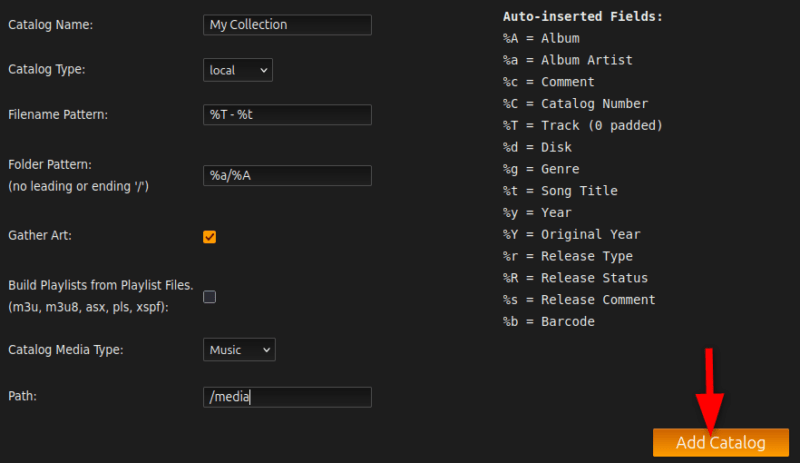
After adding the catalog, click Update Catalog to scan your media files.
The first scan might take a while, depending on how big your media collection is. Ampache analyzes each file to extract metadata, create thumbnails, and build its database.
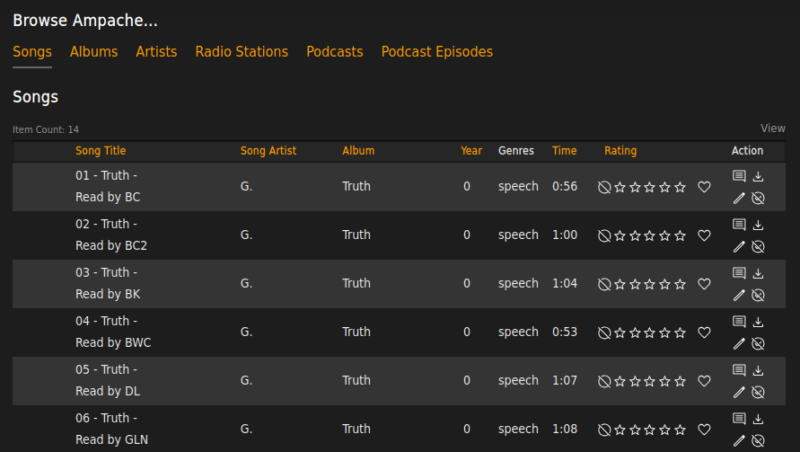
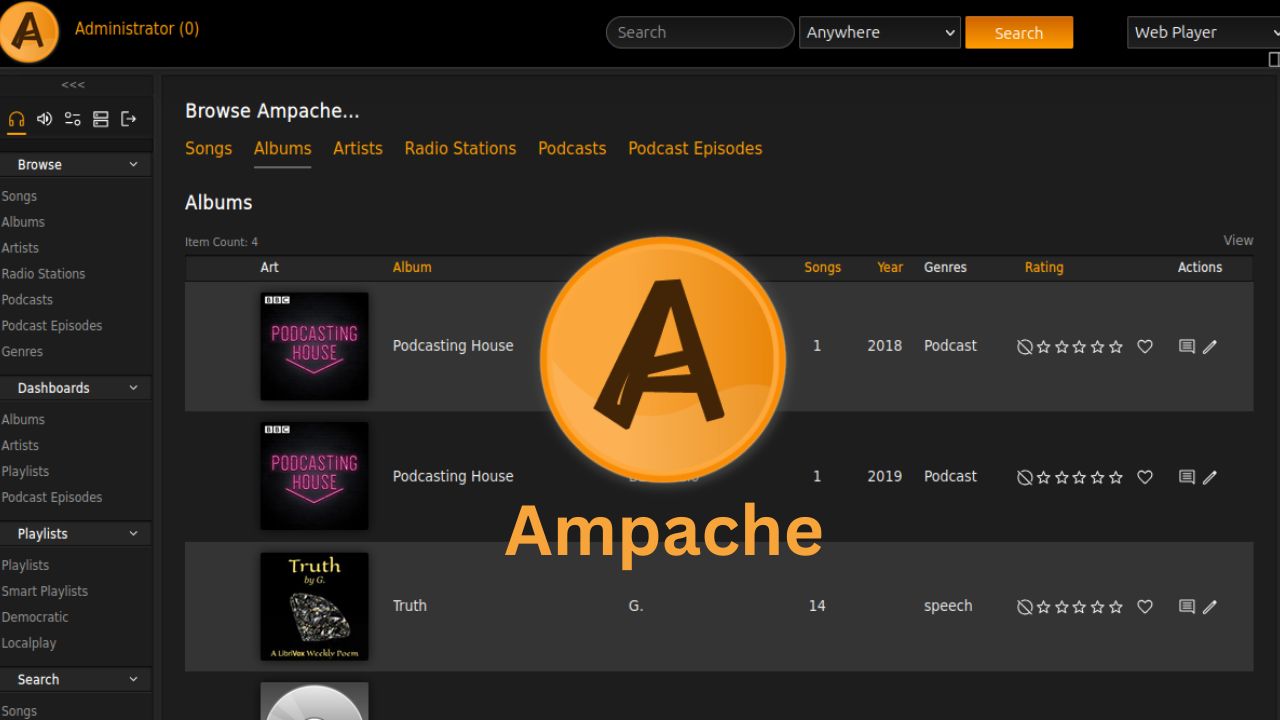
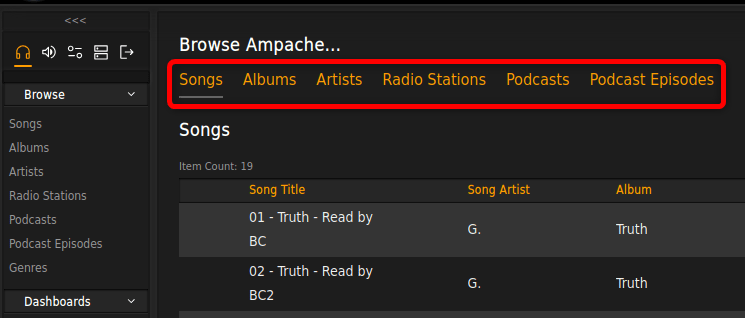
Ampache offers various ways to navigate your media collection. You can browse by artists, albums, genres, or years. The search functionality is particularly powerful, allowing you to find specific tracks or albums quickly, even in large libraries.
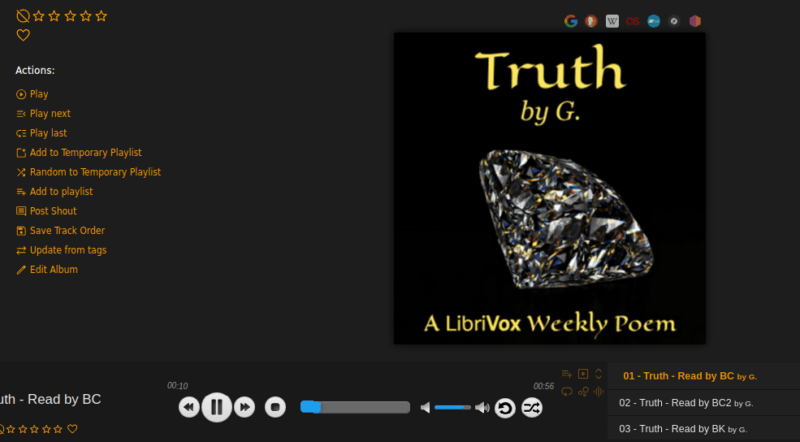
What’s more, Ampache provides complete control over audio playback with various actions like play next, play last, add to playlist, and more.
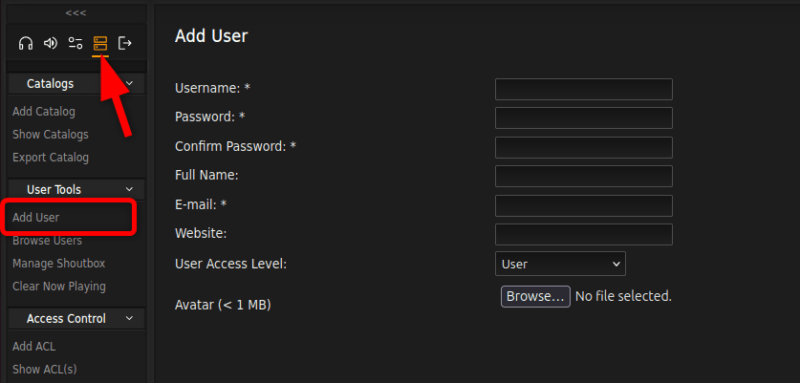
If you want to create accounts for other users in your household, go to the Admin section and click Add Users to create new user accounts.
Ampache mobile apps connections
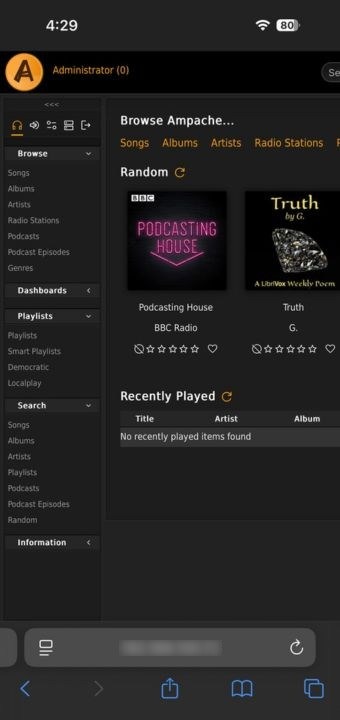
With Ampache, you are not tethered to your server. Whether you’re on your phone or tablet, you can stream content from anywhere, provided you have an internet connection.
Ampache does not have an official mobile app. However, because of its web-based interface, you can access it through your mobile browser by entering your IP address with the specified Ampache port.
If you’re planning to access Ampache from outside your home network, you’ll need to set up port forwarding on your router or set up a Cloudflare tunnel.
Final Thoughts
If you’re already familiar with self-hosted streaming solutions like Jellyfin, Plex, or Audiobookshelf, you’ll find Ampache a natural fit. Its sleek, web-based interface lets you stream your media effortlessly, whether you’re at home or on the go. Further, it comes packed with features like transcoding, playlist management, and secure remote access – all designed to give you complete control over your media.
Be the first to comment! Get the discussion going.