Are you feeling nostalgic for the “good old days” of internet radio? AzuraCast is an open source radio broadcasting platform for your homelab. It can host internet radio stations and provide modern hooks to popular services today.
Features
- Comes with a comprehensive dashboard with analytics
- Support for live DJs and audio streamers
- Comes with an accessible public webpage
- Supports listener requests similar to Discord bots
- Supports web hooks for Discord, Slack, and X
- Comes with a role-based user system
- Supports object storage backends such as Amazon S3
Installation
The fastest way to install AzuraCast in your homelab through its official Docker image. To start, make sure that you have Docker and Docker Compose running on your system.
Create a directory on your homelab user’s home directory for AzuraCast:
mkdir ~/azuracast
cd ~/azuracast
Download the official Docker script for AzuraCast to your homelab:
wget https://raw.githubusercontent.com/AzuraCast/AzuraCast/main/docker.shSet the correct permission bits for the AzuraCast script, then run it to start the installation process:
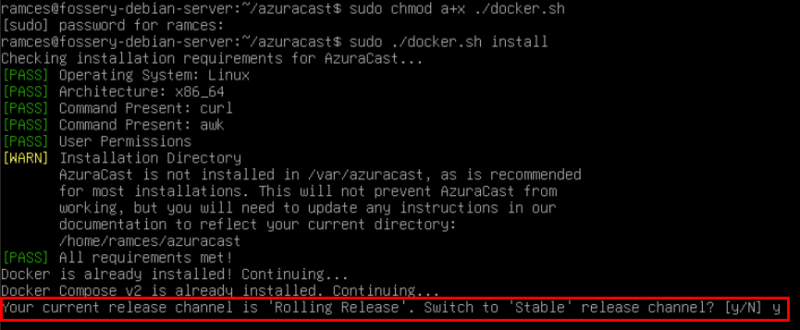
sudo chmod a+x ./docker.sh
sudo ./docker.sh install
Type y, then press Enter to set the current release channel to Stable.
Type y, then press Enter to refresh the install script.
Rerun the AzuraCast Docker script to install it on the stable branch.
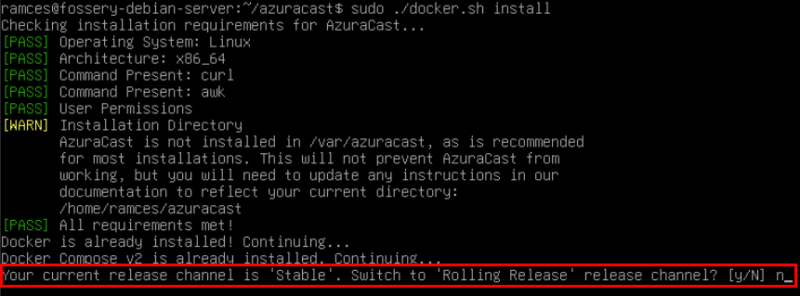
Type n, then press Enter to stay on the Stable channel.
Provide the language for your AzuraCast instance. In my case, I type “en_US” since I want to install it in English.
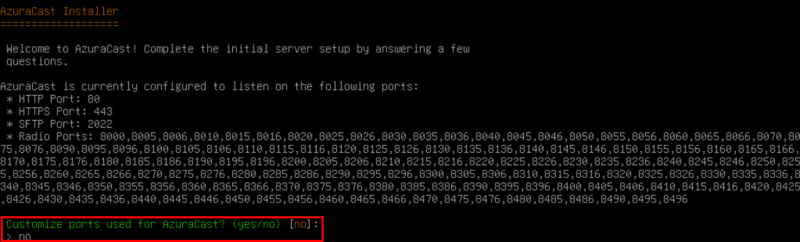
Type “no,” then press Enter to accept the default reserved ports for AzuraCast.
Type “no,” then press Enter to disable AzuraCast’s custom code plugin system.
Provide “yes,” then press Enter to enable automatic updates.
Type “yes,” then press Enter to prevent bots and crawlers from accessing your internet radio station.
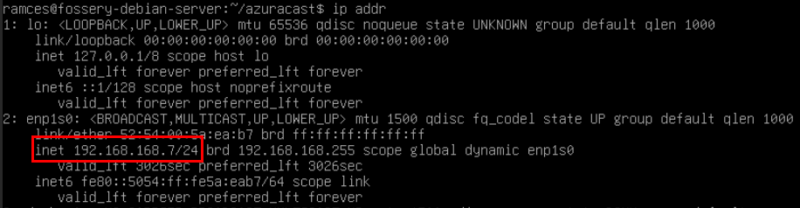
Once done, the script will print an IP address on your terminal console. This usually points to your network’s public IP address, which can be misleading if you’re running AzuraCast on a homelab or through a VPN such as Tailscale.

To get the correct IP address, run ip addr, then copy the IP address of your LAN interface. In my case, it’s enp1s0 and my machine has an address of “192.168.168.7.”
Usage
To access AzuraCast, open a web browser on your desktop, then navigate to the IP address of your server.
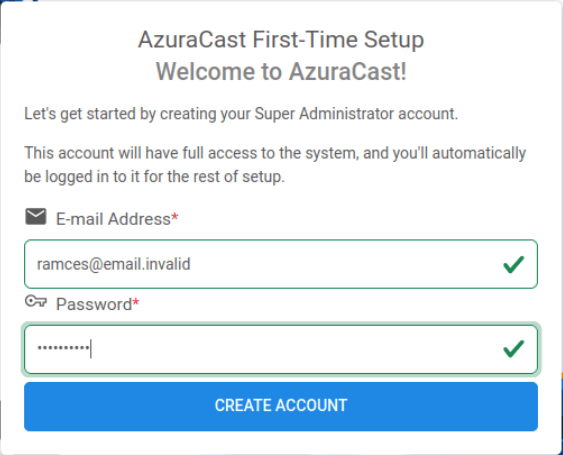
Provide an email address and a password for your instance’s superuser, then click Create Account.
Add the name of your station in the Name field, then click Create and Continue.
Type the internal IP address of your homelab under the Site Base URL field, then click Save and Continue at the bottom of the page.
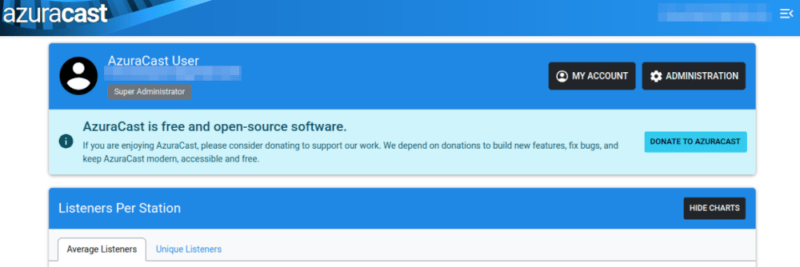
Once done, AzuraCast will log you into the dashboard. Here, you can configure the entire instance under the Administration and tweak your account in My Account.
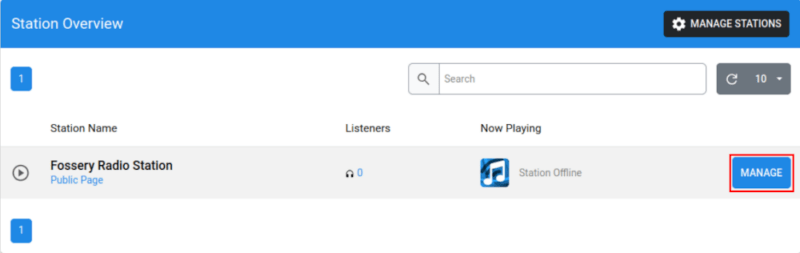
Click Manage on your station’s entry under the Station Overview section.
Similar to the general dashboard, the station dashboard presents all the available settings for your radio station. The Profile and Broadcasting sections deal with the station’s appearance and technical details.

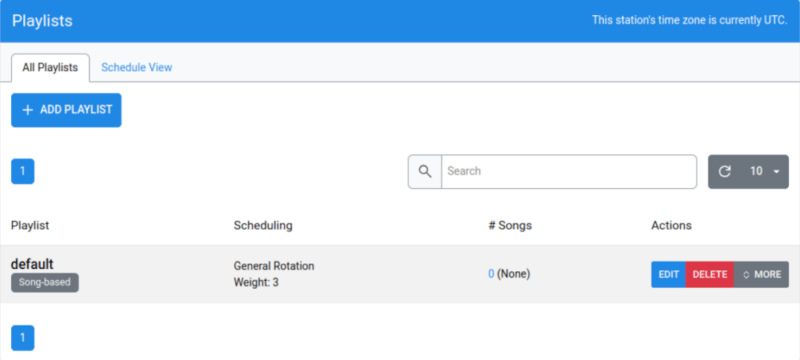
The Playlists section displays the current playlists for your station and provides tools for creating and managing them.
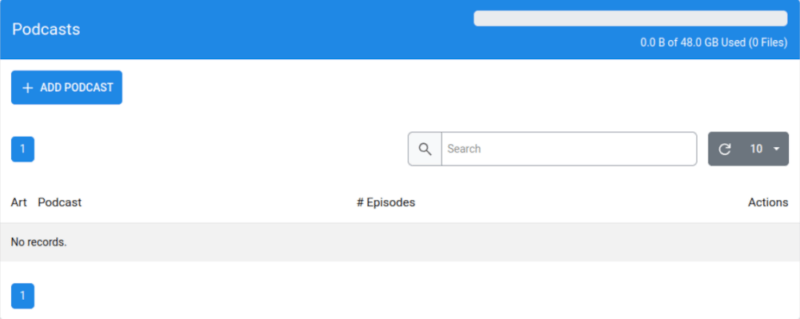
Similarly, the Podcasts section allows you to create a separate predefined program for podcasts along with your regular music stream.
Finally, the Reports and Logs sections give you a comprehensive look at the internals of your station.

Starting Your First Radio Station
To start your station, click the Media -> Music Files on the left sidebar.
Click the Select File button, then pick the audio files that you want to play.
Tick the checkbox beside the Name field. This will select all the audio files that you’ve uploaded to the server.
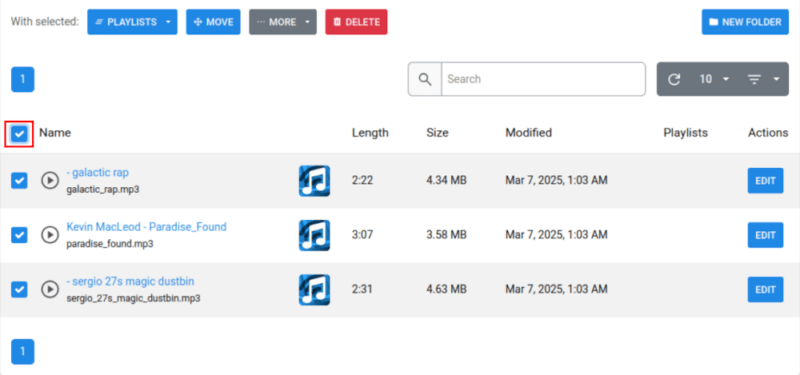
Click the Playlists drop-down box, select “default,” then click Save.
Click Start Station on the page’s left sidebar, then click Reload Configuration to start broadcasting.
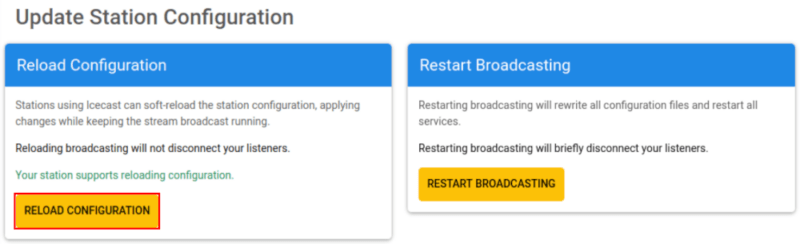
Note: it can take between 3 to 5 minutes before AzuraCast starts broadcasting your playlist.
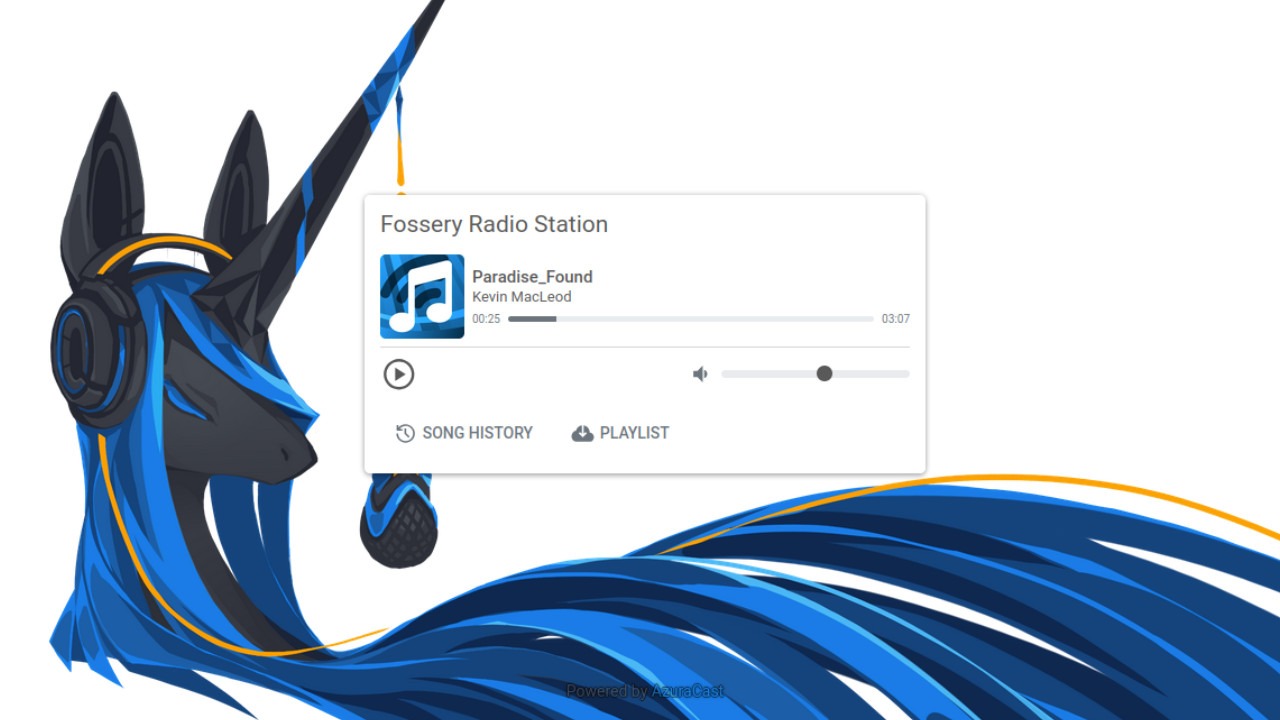
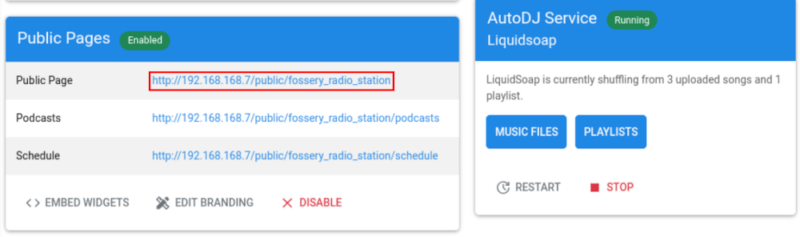
Test your station by clicking its Public Page URL under the Profile -> View Profile.
Final Thoughts
AzuraCast is a powerful and comprehensive platform for hosting and managing internet radio stations. It comes with everything that you’d want out of a radio station manager, including the ability to host multiple stations and run custom playlists and podcasts.
AzuraCast is also incredibly simple to install and deploy, making it great for both beginners and experts alike. As such, I fully recommend AzuraCast if you’re looking for a sleek and useful app to run on your homelab server today.
Be the first to comment! Get the discussion going.