Looking for a design tool that allows you to unleash your inner creativity? Look no further than Penpot. Penpot is a free alternative to Figma. It is also a powerful web design tool that allows you to design and code beautiful product together.
Features
- Real-time collaboration
- Developer tools – comes with Code inspector tool to get actual code snippets
- Infinite canvas
- Fonts management
- Advanced styling features
- Libraries & templates in app
- Flex and Grid CSS Layout
Installation
The easiest way to install Penpot is via Docker.
Create a folder for Penpot:
<span style="color: #c20cb9; font-weight: bold;">mkdir</span> penpot<br /><span style="color: #7a0874; font-weight: bold;">cd</span> penpotDownload the docker-compose file.
<span style="color: #c20cb9; font-weight: bold;">wget</span> https:<span style="color: #000000; font-weight: bold;">//</span>raw.githubusercontent.com<span style="color: #000000; font-weight: bold;">/</span>penpot<span style="color: #000000; font-weight: bold;">/</span>penpot<span style="color: #000000; font-weight: bold;">/</span>main<span style="color: #000000; font-weight: bold;">/</span>docker<span style="color: #000000; font-weight: bold;">/</span>images<span style="color: #000000; font-weight: bold;">/</span>docker-compose.yamlOpen the docker compose file:
<span style="color: #c20cb9; font-weight: bold;">nano</span> docker-compose.ymlYou should see something like this:
<span style="color: blue;">## Common flags:</span><br /><span style="color: blue;"># demo-users</span><br /><span style="color: blue;"># email-verification</span><br /><span style="color: blue;"># log-emails</span><br /><span style="color: blue;"># log-invitation-tokens</span><br /><span style="color: blue;"># login-with-github</span><br /><span style="color: blue;"># login-with-gitlab</span><br /><span style="color: blue;"># login-with-google</span><br /><span style="color: blue;"># login-with-ldap</span><br /><span style="color: blue;"># login-with-oidc</span><br /><span style="color: blue;"># login-with-password</span><br /><span style="color: blue;"># prepl-server</span><br /><span style="color: blue;"># registration</span><br /><span style="color: blue;"># secure-session-cookies</span><br /><span style="color: blue;"># smtp</span><br /><span style="color: blue;"># smtp-debug</span><br /><span style="color: blue;"># telemetry</span><br /><span style="color: blue;"># webhooks</span><br /><span style="color: blue;">##</span><br /><span style="color: blue;">## You can read more about all available flags and other</span><br /><span style="color: blue;">## environment variables here:</span><br /><span style="color: blue;">## https://help.penpot.app/technical-guide/configuration/#advanced-configuration</span><br /><span style="color: blue;">#</span><br /><span style="color: blue;"># WARNING: if you're exposing Penpot to the internet, you should remove the flags</span><br /><span style="color: blue;"># 'disable-secure-session-cookies' and 'disable-email-verification'</span><span style="color: green;"><br />x-flags</span><span style="font-weight: bold; color: brown;">: </span><span style="color: #FF7000;">&penpot-flags</span><span style="color: green;"><br /> PENPOT_FLAGS</span><span style="font-weight: bold; color: brown;">: </span>disable-email-verification enable-smtp enable-prepl-server disable-secure-session-cookies<br /><span style="color: green;"><br />x-uri</span><span style="font-weight: bold; color: brown;">: </span><span style="color: #FF7000;">&penpot-public-uri</span><span style="color: green;"><br /> PENPOT_PUBLIC_URI</span><span style="font-weight: bold; color: brown;">: </span>http://localhost:9001<br /><span style="color: green;"><br />x-body-size</span><span style="font-weight: bold; color: brown;">: </span><span style="color: #FF7000;">&penpot-http-body-size</span><br /> <span style="color: blue;"># Max body size (30MiB); Used for plain requests, should never be</span><br /> <span style="color: blue;"># greater than multi-part size</span><span style="color: green;"><br /> PENPOT_HTTP_SERVER_MAX_BODY_SIZE</span><span style="font-weight: bold; color: brown;">: </span>31457280<br /><br /> <span style="color: blue;"># Max multipart body size (350MiB)</span><span style="color: green;"><br /> PENPOT_HTTP_SERVER_MAX_MULTIPART_BODY_SIZE</span><span style="font-weight: bold; color: brown;">: </span>367001600<br /><br /><span style="color: #007F45;"><br />networks</span>:<span style="color: #007F45;"><br /> penpot</span><span style="font-weight: bold; color: brown;">:<br /></span><span style="color: #007F45;"><br />volumes</span>:<span style="color: #007F45;"><br /> penpot_postgres_v15</span>:<span style="color: #007F45;"><br /> penpot_assets</span><span style="font-weight: bold; color: brown;">:<br /></span> <span style="color: blue;"># penpot_traefik:</span><br /> <span style="color: blue;"># penpot_minio:</span><br /><span style="color: #007F45;"><br />services</span><span style="font-weight: bold; color: brown;">:<br /></span> <span style="color: blue;">## Traefik service declaration example. Consider using it if you are going to expose</span><br /> <span style="color: blue;">## penpot to the internet, or a different host than `localhost`.</span><br /><br /> <span style="color: blue;"># traefik:</span><br /> <span style="color: blue;"># image: traefik:v2.9</span><br /> <span style="color: blue;"># networks:</span><br /> <span style="color: blue;"># - penpot</span><br /> <span style="color: blue;"># command:</span><br /> <span style="color: blue;"># - "--api.insecure=true"</span><br /> <span style="color: blue;"># - "--entryPoints.web.address=:80"</span><br /> <span style="color: blue;"># - "--providers.docker=true"</span><br /> <span style="color: blue;"># - "--providers.docker.exposedbydefault=false"</span><br /> <span style="color: blue;"># - "--entryPoints.websecure.address=:443"</span><br /> <span style="color: blue;"># - "--certificatesresolvers.letsencrypt.acme.tlschallenge=true"</span><br /> <span style="color: blue;"># - "--certificatesresolvers.letsencrypt.acme.email=<EMAIL_ADDRESS>"</span><br /> <span style="color: blue;"># - "--certificatesresolvers.letsencrypt.acme.storage=/traefik/acme.json"</span><br /> <span style="color: blue;"># volumes:</span><br /> <span style="color: blue;"># - "penpot_traefik:/traefik"</span><br /> <span style="color: blue;"># - "/var/run/docker.sock:/var/run/docker.sock"</span><br /> <span style="color: blue;"># ports:</span><br /> <span style="color: blue;"># - "80:80"</span><br /> <span style="color: blue;"># - "443:443"</span><br /><span style="color: #007F45;"><br /> penpot-frontend</span>:<span style="color: green;"><br /> image</span><span style="font-weight: bold; color: brown;">: </span><span style="color: #CF00CF;">"penpotapp/frontend:latest"</span><span style="color: green;"><br /> restart</span><span style="font-weight: bold; color: brown;">: </span>always<span style="color: #007F45;"><br /> ports</span><span style="font-weight: bold; color: brown;">:<br /></span> - 9001:8080<br /><span style="color: #007F45;"><br /> volumes</span><span style="font-weight: bold; color: brown;">:<br /></span> - penpot_assets:/opt/data/assets<br /><span style="color: #007F45;"><br /> depends_on</span><span style="font-weight: bold; color: brown;">:<br /></span> - penpot-backend<br /> - penpot-exporter<br /><span style="color: #007F45;"><br /> networks</span><span style="font-weight: bold; color: brown;">:<br /></span> - penpot<br /><span style="color: #007F45;"><br /> labels</span><span style="font-weight: bold; color: brown;">:<br /></span> - <span style="color: #CF00CF;">"traefik.enable=true"</span><br /><br /> <span style="color: blue;">## HTTP: example of labels for the case where penpot will be exposed to the</span><br /> <span style="color: blue;">## internet with only HTTP (without HTTPS) using traefik.</span><br /><br /> <span style="color: blue;"># - "traefik.http.routers.penpot-http.entrypoints=web"</span><br /> <span style="color: blue;"># - "traefik.http.routers.penpot-http.rule=Host(`<DOMAIN_NAME>`)"</span><br /> <span style="color: blue;"># - "traefik.http.services.penpot-http.loadbalancer.server.port=80"</span><br /><br /> <span style="color: blue;">## HTTPS: example of labels for the case where penpot will be exposed to the</span><br /> <span style="color: blue;">## internet with HTTPS using traefik.</span><br /><br /> <span style="color: blue;"># - "traefik.http.middlewares.http-redirect.redirectscheme.scheme=https"</span><br /> <span style="color: blue;"># - "traefik.http.middlewares.http-redirect.redirectscheme.permanent=true"</span><br /> <span style="color: blue;"># - "traefik.http.routers.penpot-http.entrypoints=web"</span><br /> <span style="color: blue;"># - "traefik.http.routers.penpot-http.rule=Host(`<DOMAIN_NAME>`)"</span><br /> <span style="color: blue;"># - "traefik.http.routers.penpot-http.middlewares=http-redirect"</span><br /> <span style="color: blue;"># - "traefik.http.routers.penpot-https.entrypoints=websecure"</span><br /> <span style="color: blue;"># - "traefik.http.routers.penpot-https.rule=Host(`<DOMAIN_NAME>`)"</span><br /> <span style="color: blue;"># - "traefik.http.services.penpot-https.loadbalancer.server.port=80"</span><br /> <span style="color: blue;"># - "traefik.http.routers.penpot-https.tls=true"</span><br /> <span style="color: blue;"># - "traefik.http.routers.penpot-https.tls.certresolver=letsencrypt"</span><br /><span style="color: #007F45;"><br /> environment</span>:<span style="color: green;"><br /> << </span><span style="font-weight: bold; color: brown;">: </span><span class="br0">[</span>*penpot-flags, *penpot-http-body-size<span class="br0">]</span><br /><span style="color: #007F45;"><br /> penpot-backend</span>:<span style="color: green;"><br /> image</span><span style="font-weight: bold; color: brown;">: </span><span style="color: #CF00CF;">"penpotapp/backend:latest"</span><span style="color: green;"><br /> restart</span><span style="font-weight: bold; color: brown;">: </span>always<br /><span style="color: #007F45;"><br /> volumes</span><span style="font-weight: bold; color: brown;">:<br /></span> - penpot_assets:/opt/data/assets<br /><span style="color: #007F45;"><br /> depends_on</span><span style="font-weight: bold; color: brown;">:<br /></span> - penpot-postgres<br /> - penpot-redis<br /><span style="color: #007F45;"><br /> networks</span><span style="font-weight: bold; color: brown;">:<br /></span> - penpot<br /><br /> <span style="color: blue;">## Configuration envronment variables for the backend</span><br /> <span style="color: blue;">## container.</span><br /><span style="color: #007F45;"><br /> environment</span>:<span style="color: green;"><br /> << </span><span style="font-weight: bold; color: brown;">: </span><span class="br0">[</span>*penpot-flags, *penpot-public-uri, *penpot-http-body-size<span class="br0">]</span><br /><br /> <span style="color: blue;">## Penpot SECRET KEY. It serves as a master key from which other keys for subsystems</span><br /> <span style="color: blue;">## (eg http sessions, or invitations) are derived.</span><br /> <span style="color: blue;">##</span><br /> <span style="color: blue;">## If you leave it commented, all created sessions and invitations will</span><br /> <span style="color: blue;">## become invalid on container restart.</span><br /> <span style="color: blue;">##</span><br /> <span style="color: blue;">## If you going to uncomment this, we recommend to use a trully randomly generated</span><br /> <span style="color: blue;">## 512 bits base64 encoded string here. You can generate one with:</span><br /> <span style="color: blue;">##</span><br /> <span style="color: blue;">## python3 -c "import secrets; print(secrets.token_urlsafe(64))"</span><br /><br /> <span style="color: blue;"># PENPOT_SECRET_KEY: my-insecure-key</span><br /><br /> <span style="color: blue;">## The PREPL host. Mainly used for external programatic access to penpot backend</span><br /> <span style="color: blue;">## (example: admin). By default it will listen on `localhost` but if you are going to use</span><br /> <span style="color: blue;">## the `admin`, you will need to uncomment this and set the host to `0.0.0.0`.</span><br /><br /> <span style="color: blue;"># PENPOT_PREPL_HOST: 0.0.0.0</span><br /><br /> <span style="color: blue;">## Database connection parameters. Don't touch them unless you are using custom</span><br /> <span style="color: blue;">## postgresql connection parameters.</span><br /><span style="color: green;"><br /> PENPOT_DATABASE_URI</span><span style="font-weight: bold; color: brown;">: </span>postgresql://penpot-postgres/penpot<span style="color: green;"><br /> PENPOT_DATABASE_USERNAME</span><span style="font-weight: bold; color: brown;">: </span>penpot<span style="color: green;"><br /> PENPOT_DATABASE_PASSWORD</span><span style="font-weight: bold; color: brown;">: </span>penpot<br /><br /> <span style="color: blue;">## Redis is used for the websockets notifications. Don't touch unless the redis</span><br /> <span style="color: blue;">## container has different parameters or different name.</span><br /><span style="color: green;"><br /> PENPOT_REDIS_URI</span><span style="font-weight: bold; color: brown;">: </span>redis://penpot-redis/0<br /><br /> <span style="color: blue;">## Default configuration for assets storage: using filesystem based with all files</span><br /> <span style="color: blue;">## stored in a docker volume.</span><br /><span style="color: green;"><br /> PENPOT_ASSETS_STORAGE_BACKEND</span><span style="font-weight: bold; color: brown;">: </span>assets-fs<span style="color: green;"><br /> PENPOT_STORAGE_ASSETS_FS_DIRECTORY</span><span style="font-weight: bold; color: brown;">: </span>/opt/data/assets<br /><br /> <span style="color: blue;">## Also can be configured to to use a S3 compatible storage</span><br /> <span style="color: blue;">## service like MiniIO. Look below for minio service setup.</span><br /><br /> <span style="color: blue;"># AWS_ACCESS_KEY_ID: <KEY_ID></span><br /> <span style="color: blue;"># AWS_SECRET_ACCESS_KEY: <ACCESS_KEY></span><br /> <span style="color: blue;"># PENPOT_ASSETS_STORAGE_BACKEND: assets-s3</span><br /> <span style="color: blue;"># PENPOT_STORAGE_ASSETS_S3_ENDPOINT: http://penpot-minio:9000</span><br /> <span style="color: blue;"># PENPOT_STORAGE_ASSETS_S3_BUCKET: <BUKET_NAME></span><br /><br /> <span style="color: blue;">## Telemetry. When enabled, a periodical process will send anonymous data about this</span><br /> <span style="color: blue;">## instance. Telemetry data will enable us to learn how the application is used,</span><br /> <span style="color: blue;">## based on real scenarios. If you want to help us, please leave it enabled. You can</span><br /> <span style="color: blue;">## audit what data we send with the code available on github.</span><br /><span style="color: green;"><br /> PENPOT_TELEMETRY_ENABLED</span><span style="font-weight: bold; color: brown;">: </span>true<br /><br /> <span style="color: blue;">## Example SMTP/Email configuration. By default, emails are sent to the mailcatch</span><br /> <span style="color: blue;">## service, but for production usage it is recommended to setup a real SMTP</span><br /> <span style="color: blue;">## provider. Emails are used to confirm user registrations & invitations. Look below</span><br /> <span style="color: blue;">## how the mailcatch service is configured.</span><br /><span style="color: green;"><br /> PENPOT_SMTP_DEFAULT_FROM</span><span style="font-weight: bold; color: brown;">: </span>no-reply@example.com<span style="color: green;"><br /> PENPOT_SMTP_DEFAULT_REPLY_TO</span><span style="font-weight: bold; color: brown;">: </span>no-reply@example.com<span style="color: green;"><br /> PENPOT_SMTP_HOST</span><span style="font-weight: bold; color: brown;">: </span>penpot-mailcatch<span style="color: green;"><br /> PENPOT_SMTP_PORT</span><span style="font-weight: bold; color: brown;">: </span>1025<span style="color: #007F45;"><br /> PENPOT_SMTP_USERNAME</span>:<span style="color: #007F45;"><br /> PENPOT_SMTP_PASSWORD</span>:<span style="color: green;"><br /> PENPOT_SMTP_TLS</span><span style="font-weight: bold; color: brown;">: </span>false<span style="color: green;"><br /> PENPOT_SMTP_SSL</span><span style="font-weight: bold; color: brown;">: </span>false<br /><span style="color: #007F45;"><br /> penpot-exporter</span>:<span style="color: green;"><br /> image</span><span style="font-weight: bold; color: brown;">: </span><span style="color: #CF00CF;">"penpotapp/exporter:latest"</span><span style="color: green;"><br /> restart</span><span style="font-weight: bold; color: brown;">: </span>always<span style="color: #007F45;"><br /> networks</span><span style="font-weight: bold; color: brown;">:<br /></span> - penpot<br /><span style="color: #007F45;"><br /> environment</span><span style="font-weight: bold; color: brown;">:<br /></span> <span style="color: blue;"># Don't touch it; this uses an internal docker network to</span><br /> <span style="color: blue;"># communicate with the frontend.</span><span style="color: green;"><br /> PENPOT_PUBLIC_URI</span><span style="font-weight: bold; color: brown;">: </span>http://penpot-frontend:8080<br /><br /> <span style="color: blue;">## Redis is used for the websockets notifications.</span><span style="color: green;"><br /> PENPOT_REDIS_URI</span><span style="font-weight: bold; color: brown;">: </span>redis://penpot-redis/0<br /><span style="color: #007F45;"><br /> penpot-postgres</span>:<span style="color: green;"><br /> image</span><span style="font-weight: bold; color: brown;">: </span><span style="color: #CF00CF;">"postgres:15"</span><span style="color: green;"><br /> restart</span><span style="font-weight: bold; color: brown;">: </span>always<span style="color: green;"><br /> stop_signal</span><span style="font-weight: bold; color: brown;">: </span>SIGINT<br /><span style="color: #007F45;"><br /> volumes</span><span style="font-weight: bold; color: brown;">:<br /></span> - penpot_postgres_v15:/var/lib/postgresql/data<br /><span style="color: #007F45;"><br /> networks</span><span style="font-weight: bold; color: brown;">:<br /></span> - penpot<br /><span style="color: #007F45;"><br /> environment</span><span style="font-weight: bold; color: brown;">:<br /></span> - POSTGRES_INITDB_ARGS=--data-checksums<br /> - POSTGRES_DB=penpot<br /> - POSTGRES_USER=penpot<br /> - POSTGRES_PASSWORD=penpot<br /><span style="color: #007F45;"><br /> penpot-redis</span>:<span style="color: green;"><br /> image</span><span style="font-weight: bold; color: brown;">: </span>redis:7.2<span style="color: green;"><br /> restart</span><span style="font-weight: bold; color: brown;">: </span>always<span style="color: #007F45;"><br /> networks</span><span style="font-weight: bold; color: brown;">:<br /></span> - penpot<br /><br /> <span style="color: blue;">## A mailcatch service, used as temporal SMTP server. You can access via HTTP to the</span><br /> <span style="color: blue;">## port 1080 for read all emails the penpot platform has sent. Should be only used as a</span><br /> <span style="color: blue;">## temporal solution while no real SMTP provider is configured.</span><br /><span style="color: #007F45;"><br /> penpot-mailcatch</span>:<span style="color: green;"><br /> image</span><span style="font-weight: bold; color: brown;">: </span>sj26/mailcatcher:latest<span style="color: green;"><br /> restart</span><span style="font-weight: bold; color: brown;">: </span>always<span style="color: #007F45;"><br /> expose</span><span style="font-weight: bold; color: brown;">:<br /></span> - '1025'<span style="color: #007F45;"><br /> ports</span><span style="font-weight: bold; color: brown;">:<br /></span> - <span style="color: #CF00CF;">"1080:1080"</span><span style="color: #007F45;"><br /> networks</span><span style="font-weight: bold; color: brown;">:<br /></span> - penpot<br /><br /> <span style="color: blue;">## Example configuration of MiniIO (S3 compatible object storage service); If you don't</span><br /> <span style="color: blue;">## have preference, then just use filesystem, this is here just for the completeness.</span><br /><br /> <span style="color: blue;"># minio:</span><br /> <span style="color: blue;"># image: "minio/minio:latest"</span><br /> <span style="color: blue;"># command: minio server /mnt/data --console-address ":9001"</span><br /> <span style="color: blue;"># restart: always</span><br /> <span style="color: blue;">#</span><br /> <span style="color: blue;"># volumes:</span><br /> <span style="color: blue;"># - "penpot_minio:/mnt/data"</span><br /> <span style="color: blue;">#</span><br /> <span style="color: blue;"># environment:</span><br /> <span style="color: blue;"># - MINIO_ROOT_USER=minioadmin</span><br /> <span style="color: blue;"># - MINIO_ROOT_PASSWORD=minioadmin</span><br /> <span style="color: blue;">#</span><br /> <span style="color: blue;"># ports:</span><br /> <span style="color: blue;"># - 9000:9000</span><br /> <span style="color: blue;"># - 9001:9001</span>There are a few things that you need to configure here:
-
PENPOT_FLAGS: This will determine the features of your Penpot installation. If you are exposing it to the Internet, removedisable-secure-session-cookies‘ anddisable-email-verificationfrom the list. You can either “enable” or “disable” any of the flags. For example, if you want to disable registration, simply adddisable-registrationto the list. Or if you want to enable Github login, addenable-login-with-githubto the list. PENPOT_PUBLIC_URI: Change this if you are planning to expose the app to the Internet with its own domain name. Change it to the public URL you will be using to access the app.traefik: Thetraefikservice is included, but disabled by default. If you need a proxy server, you can enable it (by removing all the “#” in front of the entry)PENPOT_SECRET_KEY: This is a master key to keep your session secure. You should enable it and add a randomly generated 512 bits base64 encoded string. You can generate the random string with the command:
python3 -c <span style="color: #483d8b;">"import secrets; print(secrets.token_urlsafe(64))"</span>PENPOT_SMTP: The SMTP section requires you to configure your SMTP settings. If it is not properly configured, you won’t be able to receive email verification when registering for a new account.
Once you have made the above changes, save and exit the docker-compose.yml file.
Start the container:
<span style="color: #c20cb9; font-weight: bold;">docker compose</span> up <span style="color: #660033;">-d</span>Once it is running, you can access it via the URL: http://localhost:9001 or the custom domain you added earlier.
Usage
Start by creating an account on your Penpot installation.
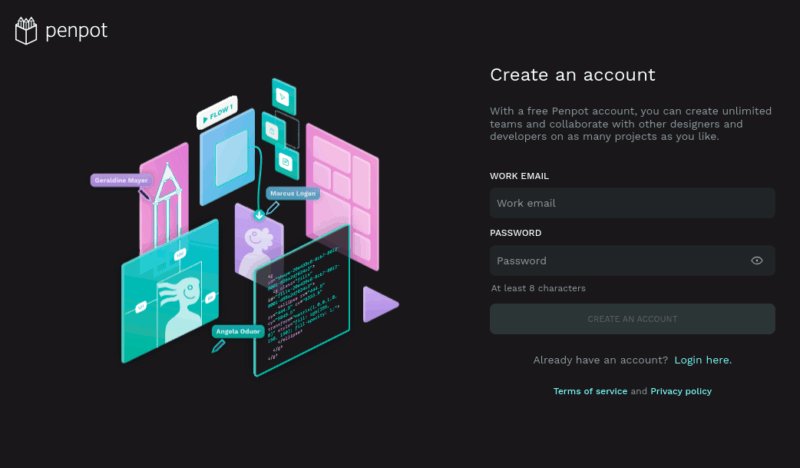
It will send you an email verification, of which you have to click the link in the email to verify your signup. After which, you will be able to login to the dashboard.
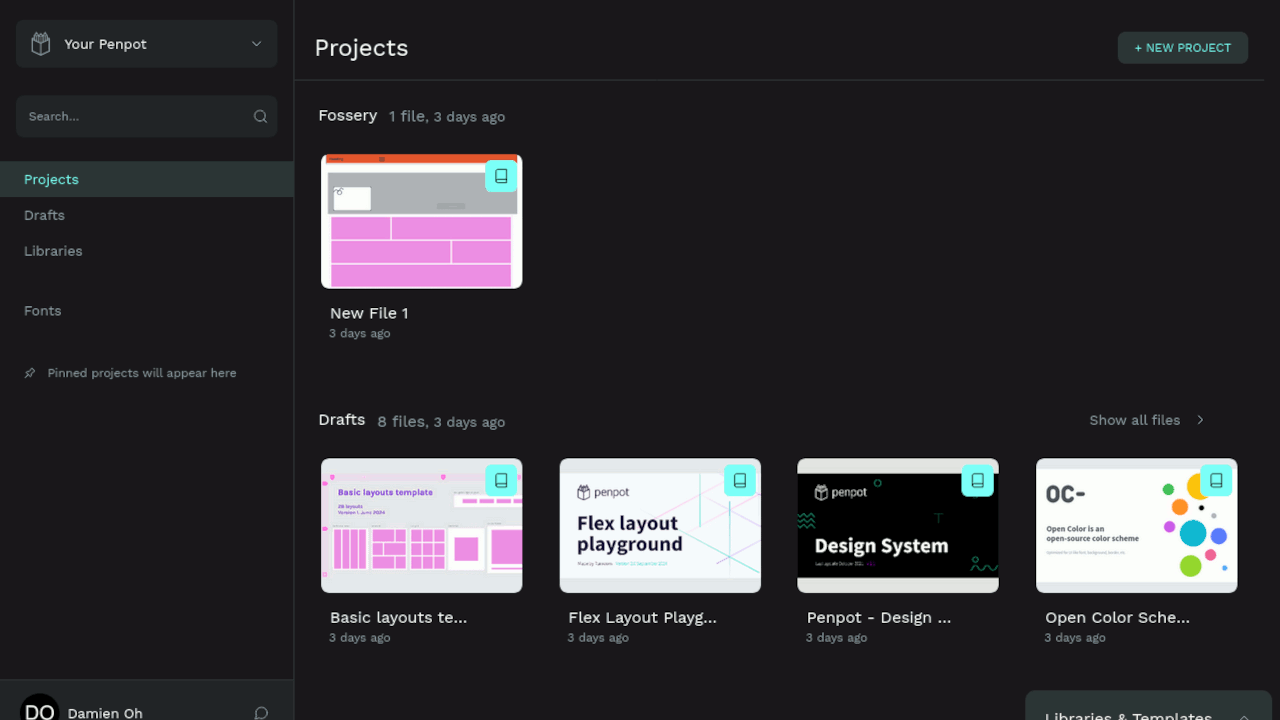
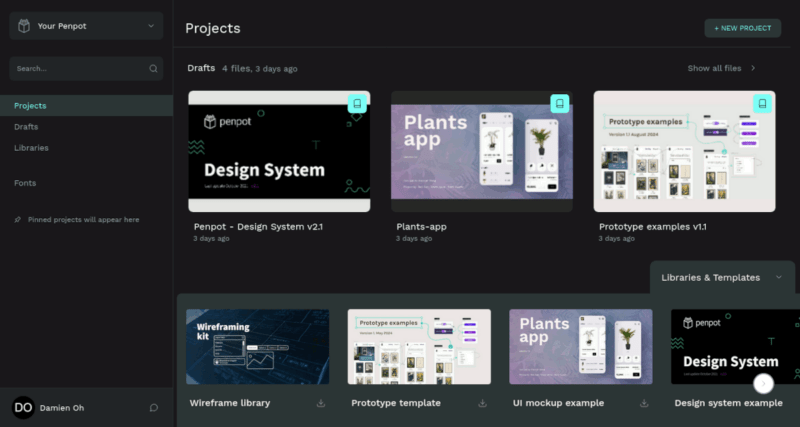
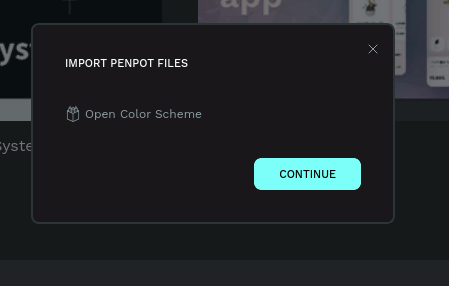
In the main project page, it will be blank (since it is new and there is no project yet). At the bottom is a list of Libraries and Templates that you can download and use them as a quick start.
You can create a Team and invite your team members to work together on your project and files.
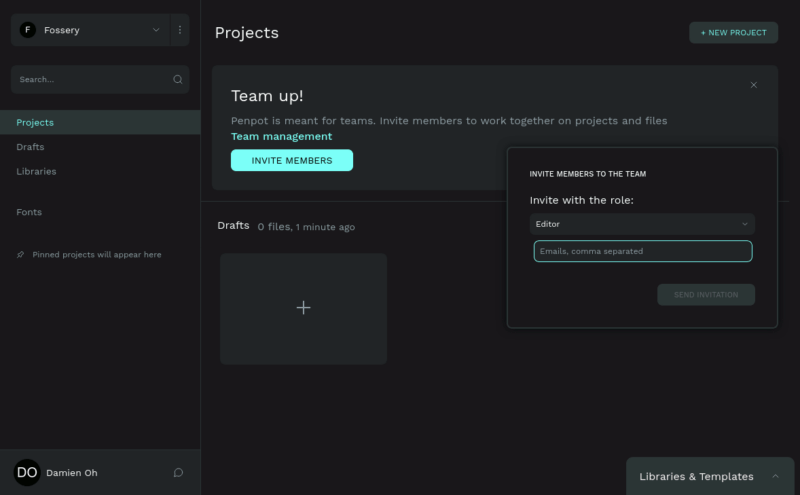
To get started, click on the “New Project” button at the top right corner. Give your project a name, and it will open up a blank canvas.
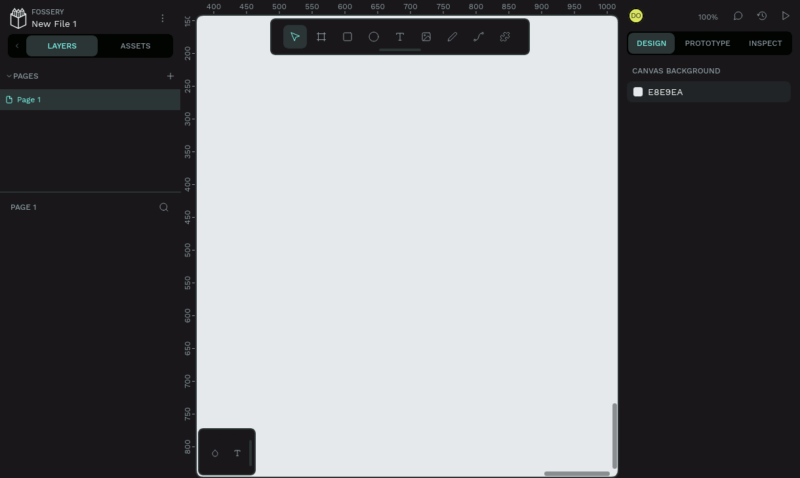
You can then proceed to unleash your creativity.
On the left panel, you can click on the “Libraries” button to add the libraries and templates you downloaded earlier to your project.
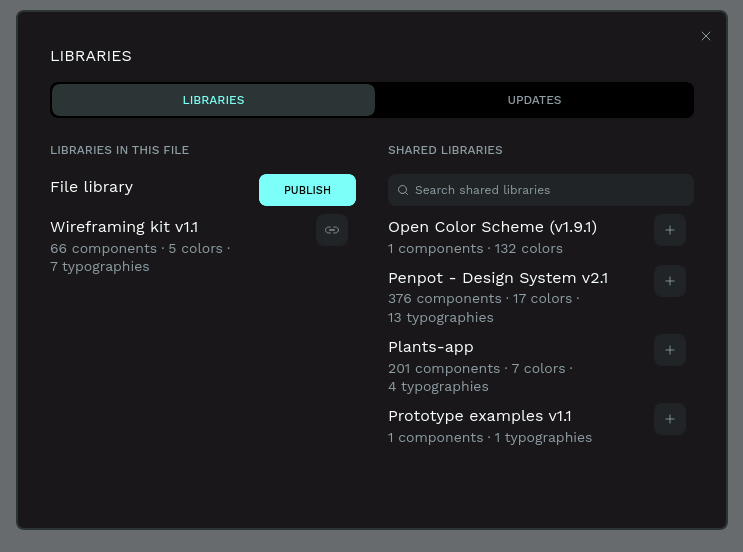
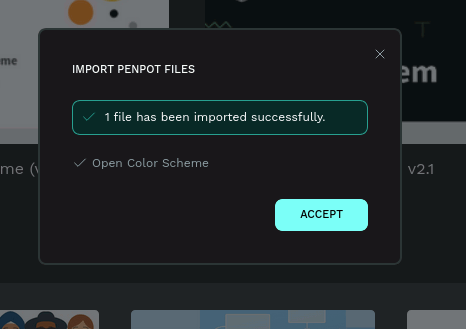
If you need more templates, you can check out the Penpot resources page and download the .penpot templates you want.
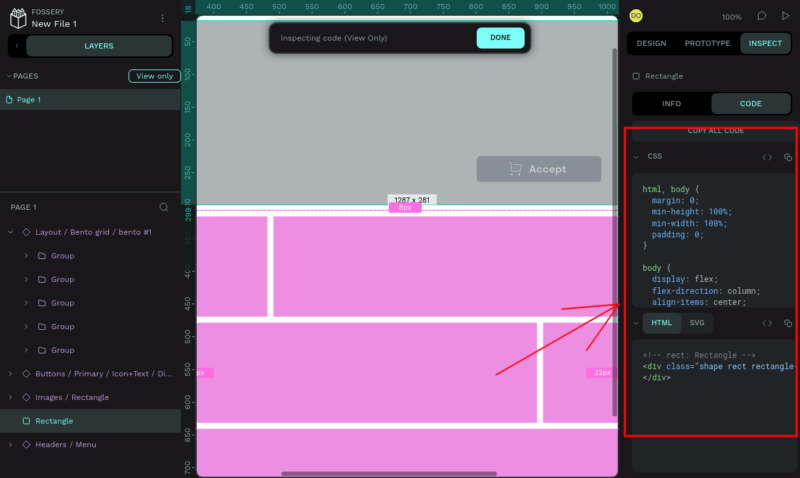
One good thing about the design in Penpot is that all your elements are in HTML/CSS format. You can click “Inspect” on the right menu to view the element’s code. This allows you to copy and paste easily in your development project.
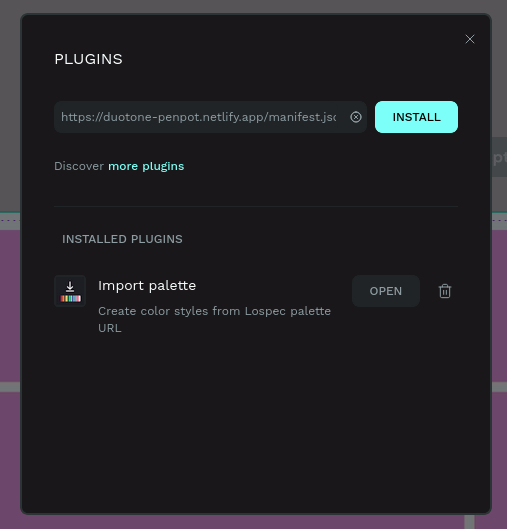
Other than libraries and templates, Penpot also supports Plugins. Check out the list of plugins here. For the plugin you want to install, copy the URL. Then in your Penpot project page, click on the three dots icon beside your project name, and select Plugins -> Plugins Manager.
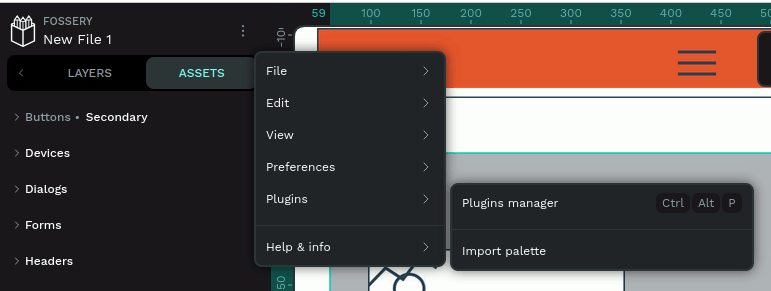
Paste the plugin url, and click Install.
Final Thoughts
If you have experience with using Figma, you’ll have no problem in using Penpot. In fact, the interface is so similar that you can get started immediately. This free version of Penpot comes has all the features you need to start designing and collaborating with your team. If you are looking for a self-hosted Figma alternative, Penpot is the one we recommend.
Be the first to comment! Get the discussion going.