Pi-Hole is a network-wide ad-blocker that you can install in your homelab, just like Adguard Home. Once enabled, it allows you to block ads and tracker on your devices that are connected to the network.
Features
- network wide ad-blocker and tracker-blocker
- Built-in DHCP Server
- Filter and block domains
- Choose from four different privacy modes that works for your environment.
- Lightweight and runs smoothly with minimal hardware and software requirements
Installation
Installing Pi-Hole is very easy. For those who want to get started quickly, you can use the one-step automated install command:
curl <span style="color: #660033;">-sSL</span> https:<span style="color: #000000; font-weight: bold;">//</span>install.pi-hole.net <span style="color: #000000; font-weight: bold;">|</span> <span style="color: #c20cb9; font-weight: bold;">bash</span>The alternate and preferred method is via Docker though.
Create a folder for pi-hole:
<span style="color: #c20cb9; font-weight: bold;">mkdir</span> pi-hole<br /><span style="color: #7a0874; font-weight: bold;">cd</span> pi-holeCreate a docker-compose.yml file and paste the following content:
<span style="color: #007F45;">services</span>:<span style="color: #007F45;"><br /> pihole</span>:<span style="color: green;"><br /> container_name</span><span style="font-weight: bold; color: brown;">: </span>pihole<span style="color: green;"><br /> image</span><span style="font-weight: bold; color: brown;">: </span>pihole/pihole:latest<br /> <span style="color: blue;"># For DHCP it is recommended to remove these ports and instead add: network_mode: "host"</span><span style="color: #007F45;"><br /> ports</span><span style="font-weight: bold; color: brown;">:<br /></span> - <span style="color: #CF00CF;">"53:53/tcp"</span><br /> - <span style="color: #CF00CF;">"53:53/udp"</span><br /> - <span style="color: #CF00CF;">"67:67/udp"</span> <span style="color: blue;"># Only required if you are using Pi-hole as your DHCP server</span><br /> - <span style="color: #CF00CF;">"80:80/tcp"</span><span style="color: #007F45;"><br /> environment</span>:<span style="color: green;"><br /> TZ</span><span style="font-weight: bold; color: brown;">: </span>'America/Chicago' <span style="color: blue;"># change this to your own timezone</span><br /> <span style="color: blue;"># WEBPASSWORD: 'set a secure password here or it will be randomly generated'</span><br /> <span style="color: blue;"># Volumes store your data between container upgrades</span><span style="color: #007F45;"><br /> volumes</span><span style="font-weight: bold; color: brown;">:<br /></span> - './etc-pihole:/etc/pihole'<br /> - './etc-dnsmasq.d:/etc/dnsmasq.d'<br /> <span style="color: blue;"># https://github.com/pi-hole/docker-pi-hole#note-on-capabilities</span><span style="color: #007F45;"><br /> cap_add</span><span style="font-weight: bold; color: brown;">:<br /></span> - NET_ADMIN <span style="color: blue;"># Required if you are using Pi-hole as your DHCP server, else not needed</span><span style="color: green;"><br /> restart</span><span style="font-weight: bold; color: brown;">: </span>unless-stoppedA few things that need to be changed:
- Change the timezone (TZ) to your current timezone
- Uncomment the WEBPASSWORD field and set your own secure password
- For your homelab server, it is best to change the port 80 to another port, so it doesn’t clash with other apps. For example,
8080:80/tcp
Note: Both Pi-Hole and Adguard Home need to access port 53 for the DNS functionality, which means they can’t be installed alongside each other.
Lastly, start the docker installation:
<span style="color: #c20cb9; font-weight: bold;">docker compose</span> up <span style="color: #660033;">-d</span>Usage
In your browser, go to http://pi.hole/admin to access the web interface. If the above url doesn’t work and you have set a custom port in place of port 80, you can access it via localhost:port/admin or http://your-local-ip-address:port/admin
You will be prompted to log in with the password you have set in the compose file.
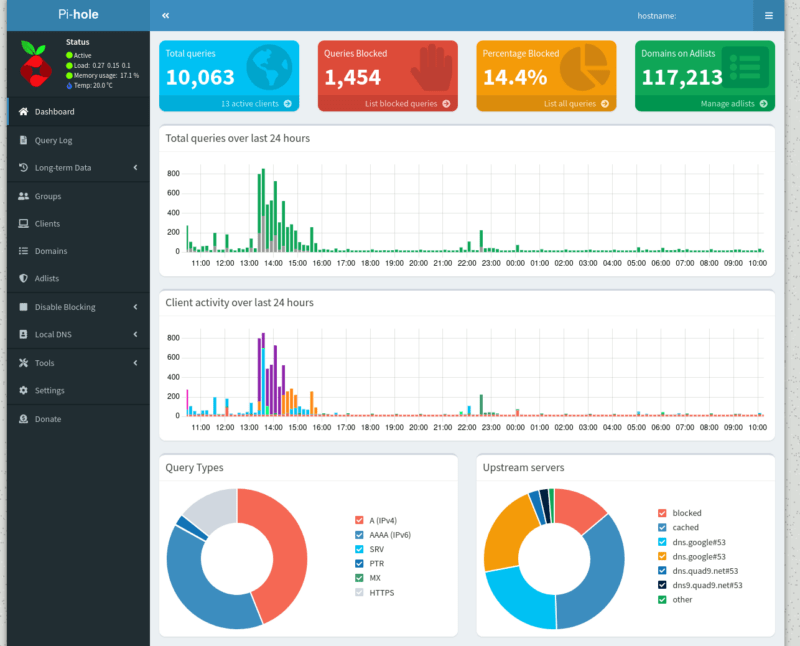
Once you are logged in, you will reach the main dashboard where it shows the various logs, queries and activities over the past 24 hours.
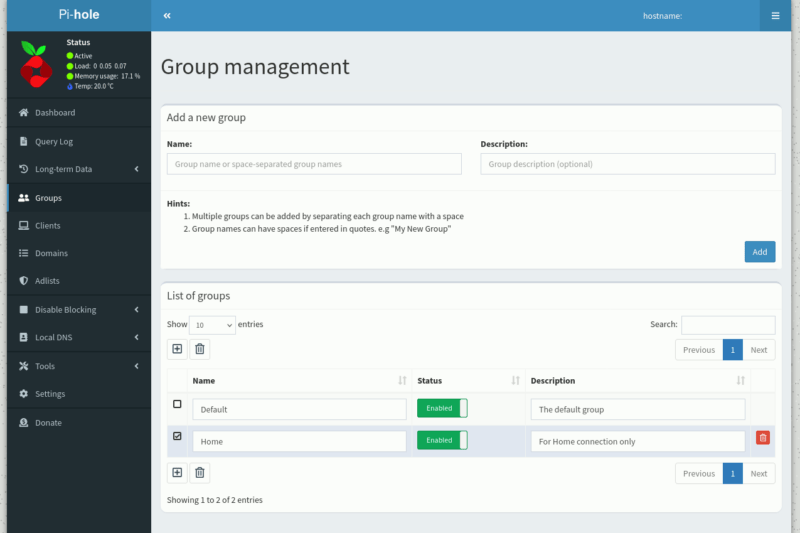
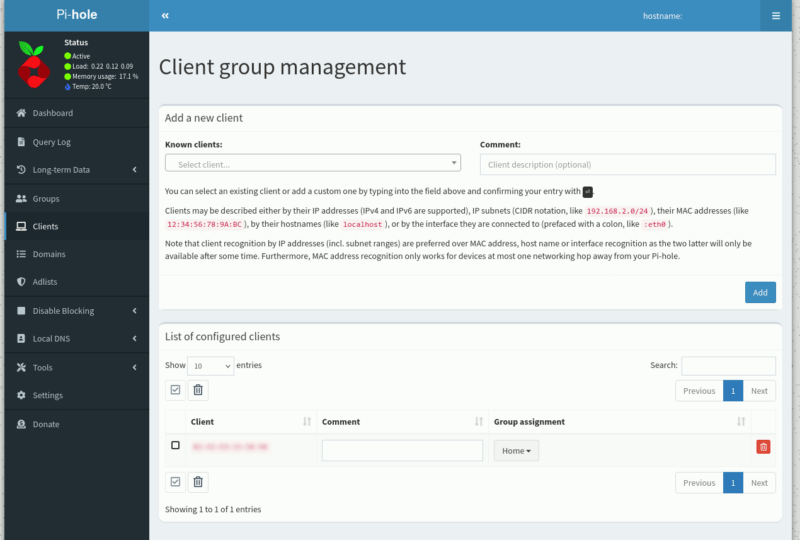
All the settings are listed in the left menu. Some interesting features including creating Group and assign the client devices to each group.
The Domains section allows you to configure the domains to whitelist/blacklist. If there are any domains that you want to allow access or block ads, add the respective entries to the list.
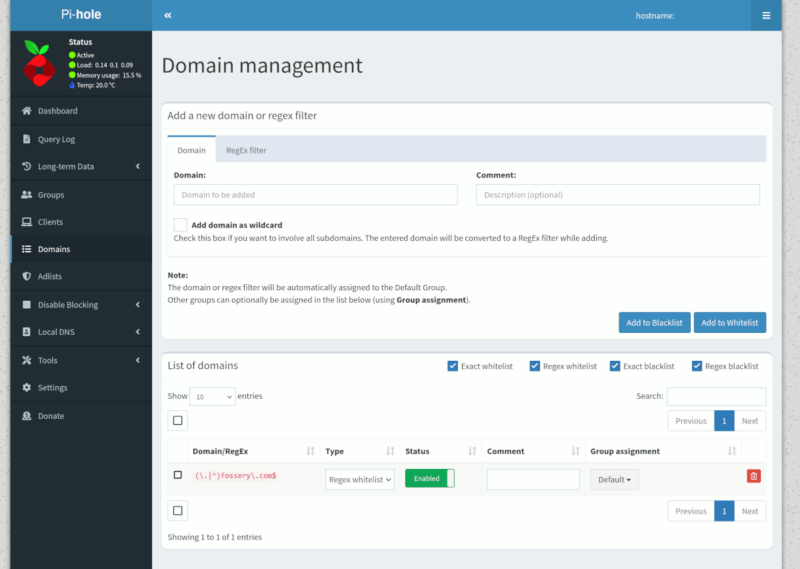
Do note that if you have blocked Google ads, even if you whitelist a domain, ads will still not shown up on that site unless you whitelist the google ads domains too.
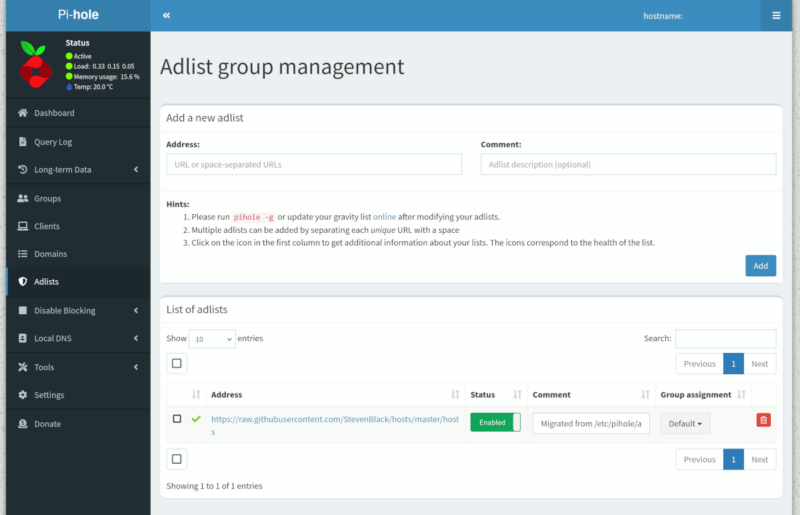
An Adlist is a list of ads domains for Pi-Hole to block. The most commonly used adlist is StevenBlack’s Hosts list and it is the default in Pi-Hole. The Adlist section is where you can add custom adlists. Personally, I find that the default adlist is good enough to block most ads.
The DNS section in Settings is where you can set the DNS for Pi-Hole to use. The default is using Google DNS, but I prefer to set it using Quad9 filtered DNS instead.
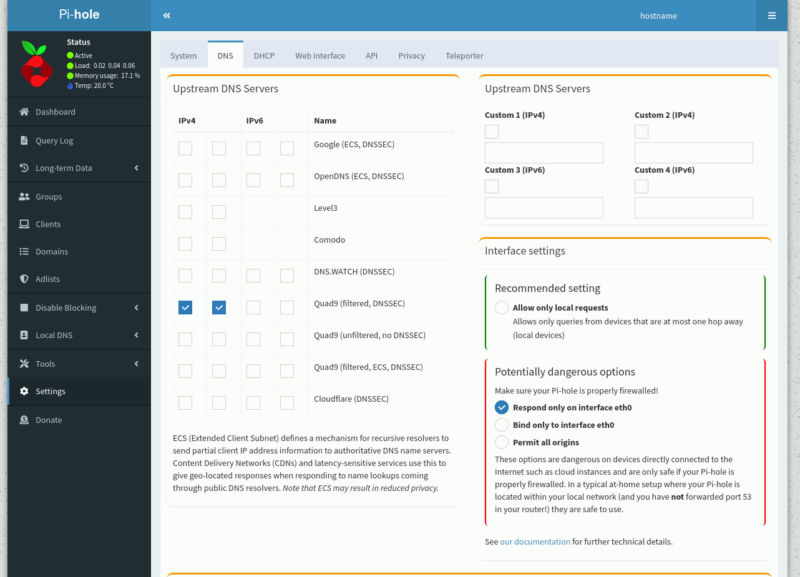
If you have custom DNS servers that you want to use, you can set it here too.
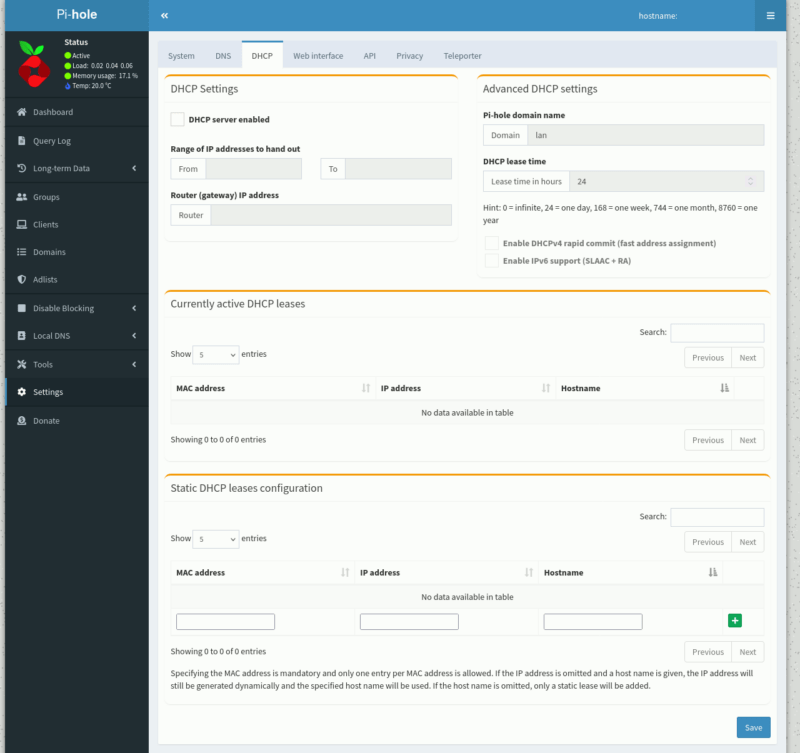
If your router doesn’t support custom DNS, you can set Pi-Hole to replace your router as the DHCP server. This means that it will take charge of assigning IP address to every connected device in your network. The configuration though, is more complicated, and is not recommended for the beginners.
Lastly, to activate Pi-Hole for your whole network, make sure you change the DNS settings on your router to point to the IP address of the device that Pi-Hole is hosted.
Final Thoughts
Overall, Pi-Hole is easy to set up and get started using it. Most of its default options work fine right out of the box and little configuration is needed. However, when it comes to features and configuration options, it is behind Adguard Home that comes with more useful features. If you are looking for a simple solution to block advertisement, Pi-Hole is the one for you.
Be the first to comment! Get the discussion going.