Technitium is a feature-packed DNS server and forwarder for your homelab. It allows you to manage DNS zone records, create domain-based blocklists, and use modern techniques to encrypt your DNS queries. Additionally, Technitium also comes with a convenient web dashboard, making it a great tool for monitoring DNS requests in your network.
Features
- Designed to be plug-and-play with minimal configuration required
- Comes with a sleek web interface for managing DNS records and monitoring queries in real time
- Can act as an authoritative DNS server and host records similar to a domain registrar
- Supports modern secure DNS protocols such as DNSSEC, DNS-over-HTTPS (DoH), and DNS-over-TLS (DoT)
- Comes prebuilt with domain-based ad and tracker blocking
- Ships with a DHCP server by default
Installation
The easiest way to install Technitium DNS in your homelab server is by using Docker and Docker Compose. Start by creating a directory on your user’s home directory:
<span style="color: #c20cb9; font-weight: bold;">mkdir</span> ~<span style="color: #000000; font-weight: bold;">/</span>technitium<br /><span style="color: #7a0874; font-weight: bold;">cd</span> ~<span style="color: #000000; font-weight: bold;">/</span>technitiumCreate a new “docker-compose.yml” file inside your new folder using your favorite text editor:
<span style="color: #c20cb9; font-weight: bold;">nano</span> .<span style="color: #000000; font-weight: bold;">/</span>docker-compose.ymlPaste the following block of code inside the new YAML file:
<span style="color: #007F45;">services</span>:<span style="color: #007F45;"><br /> dns-server</span>:<span style="color: green;"><br /> container_name</span><span style="font-weight: bold; color: brown;">: </span>fossery-dns-server<span style="color: green;"><br /> hostname</span><span style="font-weight: bold; color: brown;">: </span>fossery-dns-server<span style="color: green;"><br /> image</span><span style="font-weight: bold; color: brown;">: </span>technitium/dns-server:latest<span style="color: #007F45;"><br /> ports</span><span style="font-weight: bold; color: brown;">:<br /></span> - <span style="color: #CF00CF;">"5380:5380/tcp"</span><br /> - <span style="color: #CF00CF;">"53:53/udp"</span><br /> - <span style="color: #CF00CF;">"53:53/tcp"</span><span style="color: #007F45;"><br /> environment</span><span style="font-weight: bold; color: brown;">:<br /></span> - DNS_SERVER_DOMAIN=fossery-dns-server<br /> - DNS_SERVER_ADMIN_PASSWORD=!REPLACE-WITH-SECURE-PASSWORD!<br /> - DNS_SERVER_PREFER_IPV6=false<span style="color: #007F45;"><br /> volumes</span><span style="font-weight: bold; color: brown;">:<br /></span> - config:/etc/dns<span style="color: green;"><br /> restart</span><span style="font-weight: bold; color: brown;">: </span>unless-stopped<span style="color: #007F45;"><br /> sysctls</span><span style="font-weight: bold; color: brown;">:<br /></span> - net.ipv4.ip_local_port_range=1024 65000<br /><span style="color: #007F45;"><br />volumes</span><span style="font-weight: bold; color: brown;">:<br /></span> config:Replace the value of the DNS_SERVER_ADMIN_PASSWORD with a sufficiently random string of character.
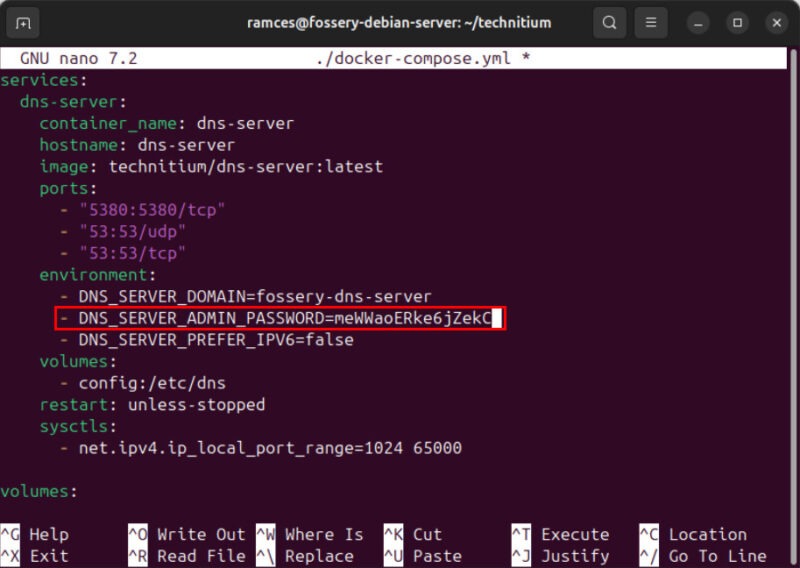
Save your “docker-compose.yml” file, then run the following command to install and deploy it on your system:
<span style="color: #c20cb9; font-weight: bold;">docker compose</span> up <span style="color: #660033;">-d</span>Usage
At this point, you now have a working Technitium instance running on your home server. To access it, open a web browser on your local machine, then type the home server’s IP address followed by 5380.

Type “admin” on the username textbox, then provide the random password that you added on your “docker-compose.yml” file.
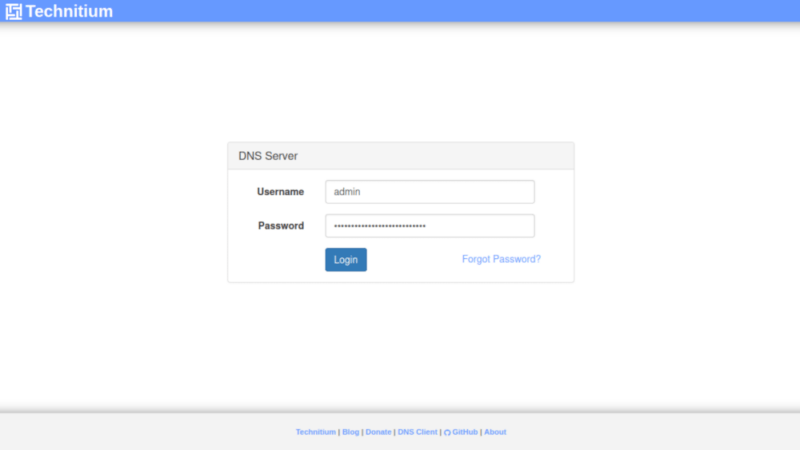
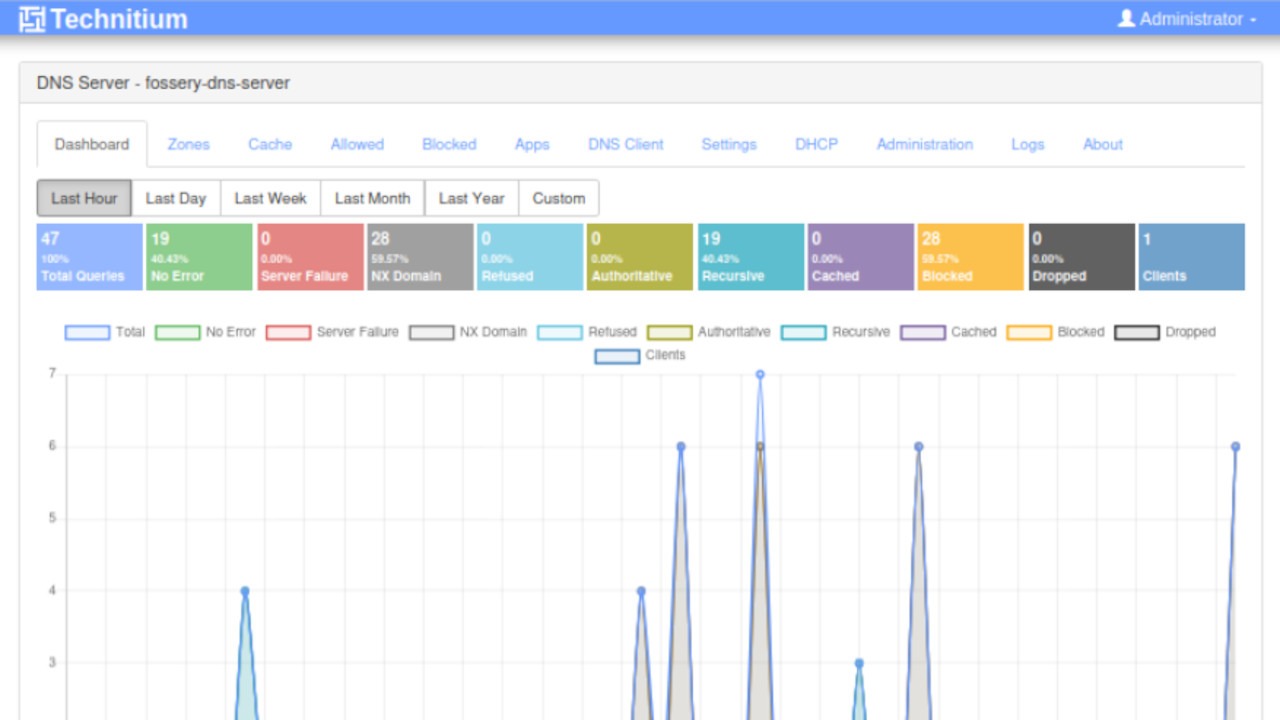
Doing this will immediately log you in Technitium’s dashboard. In here, you’ll find every feature available to the server arranged along the page’s top tab bar.

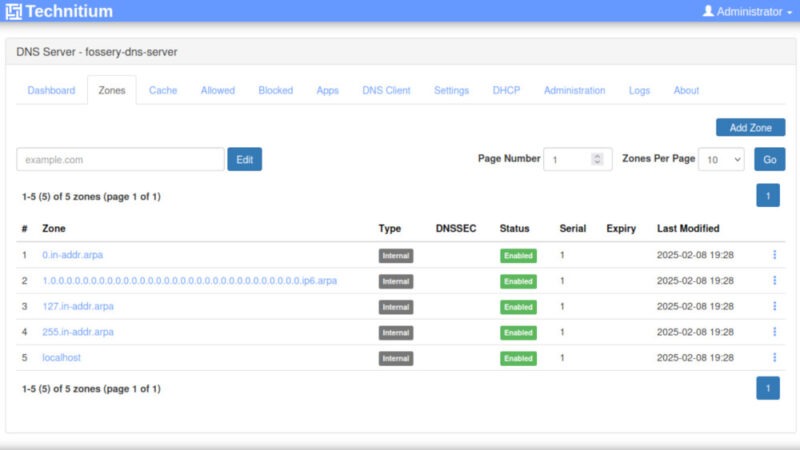
Two of the unique features of Technitium are its zone and cache configuration pages. These allow you to set the daemon as an authoritative or recursive DNS service, giving you full control over a domain.
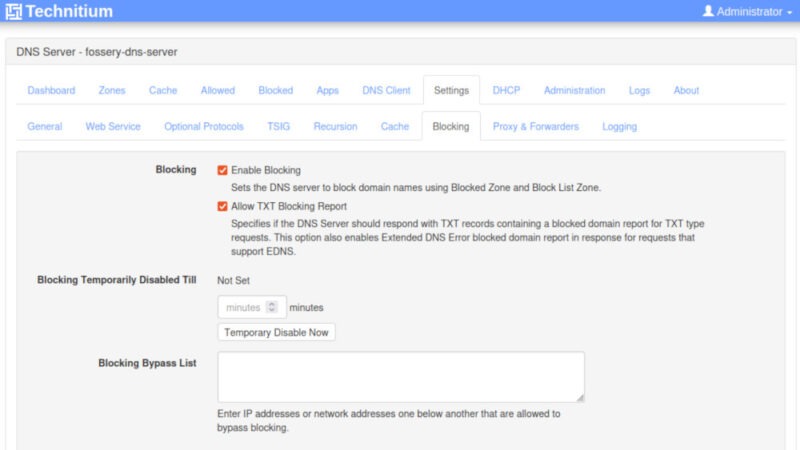
The Allowed and Blocked tabs can overwrite existing zone records if you’re using Technitium as an authoritative server. That said, it can also import a URL-based blocklist similar to AdGuard Home under the Settings tab if you want to run Technitium as a DNS forwarder.
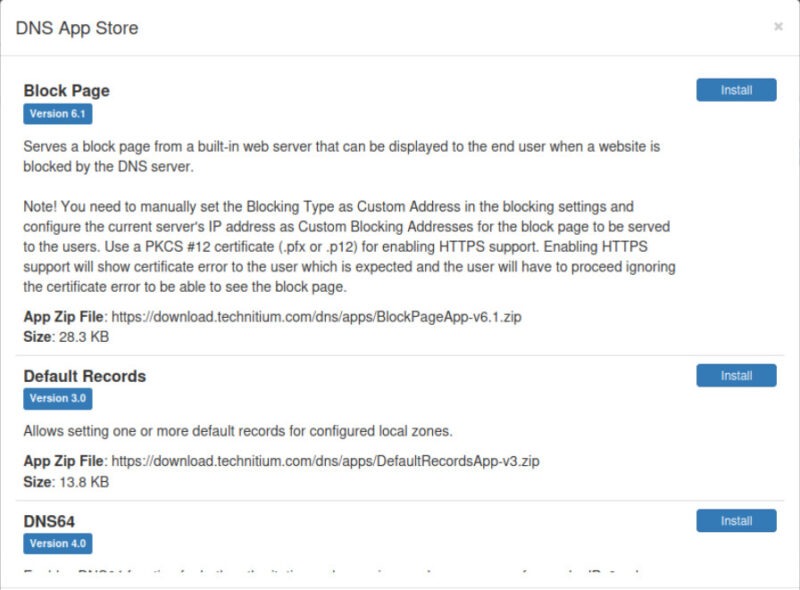
Another selling point of Technitium is its Apps category. This allows you to add tweaks to the server, giving you a finer control over how to manage DNS records and filters.
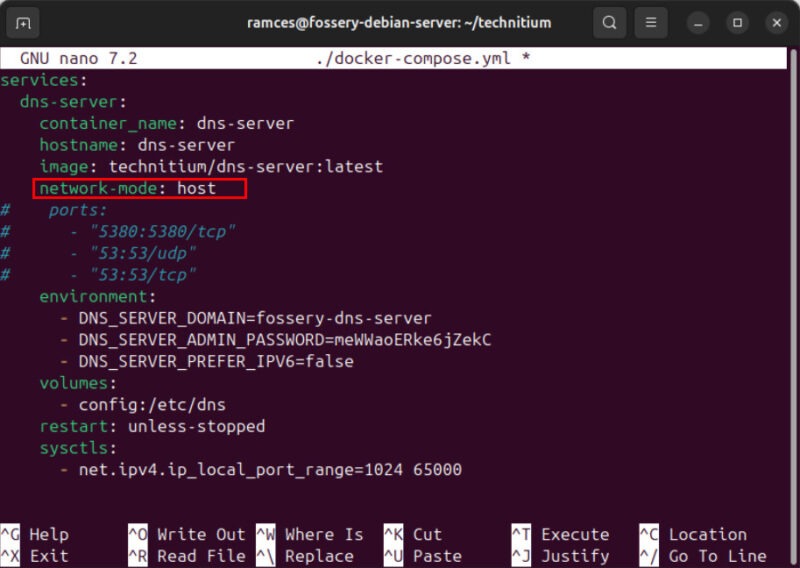
Technitium can also behave as a DHCP server if you don’t want your router to manage it for you. Keep in mind that you need to replace the entire “ports:” section of your docker-compose.yml file with “network-mode: host.”
To finalize your setup, click Settings -> Proxy & Forwarders, then scroll down to the bottom of the page. Type “9.9.9.9” on the Forwarders textbox, then click Save Settings to finalize your DNS server.

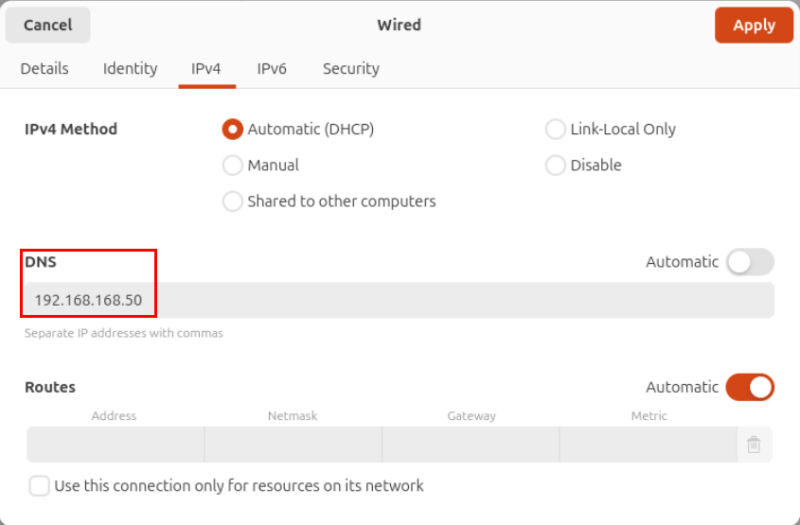
With that done, you can now use Technitium by setting either your router or PC’s DNS settings to the IP address of your home lab machine.
Final Thoughts
Technitium is a powerful program for managing DNS records, blocking ads, and encrypting DNS queries. It provides a wide range of features covering every aspect of running a DNS server. However, Technitium also suffers from a clunky and unintuitive interface. In my opinion, this can be problem especially for new users that are unfamiliar with how DNS works.
Despite its flaws, Technitium is a brilliant DNS server. The combination of its features and Docker support make it a really easy way to upgrade your existing DNS setup while also giving yourself room to grow. As such, I still recommend Technitium if you’re looking for a comprehensive DNS solution for your home network.
Be the first to comment! Get the discussion going.