WireGuard is a fast, modern and secure VPN technology that you can install easily on your homelab. It provides a secure, encrypted point-to-point connections over the Internet, without compromising the connection speed. As compared to other VPN like IPsec and OpenVPN, it has a better performance, in terms of security and speed. Initially released for the Linux kernel, it is now available for almost every platform out there.
Features
- Simple and easy to use
- Uses state-of-the-art cryptography
- Minimal Attack Surface
- High Performance
Installation
Most, if not all, of the OS platforms have support for WireGuard, so installation is just a matter of installing the software from your package manage. However, the one method that we found the easiest to install and configure is via docker, using the wg-easy docker image.
Create a folder for wireguard:
<span style="color: #c20cb9; font-weight: bold;">mkdir</span> wireguard<br /><span style="color: #7a0874; font-weight: bold;">cd</span> wireguardInside the folder, create a “docker-compose.yml” file
<span style="color: #c20cb9; font-weight: bold;">nano</span> docker-compose.ymland paste the following content:
<span style="color: #007F45;">services</span>:<span style="color: #007F45;"><br /> wg-easy</span>:<span style="color: #007F45;"><br /> environment</span><span style="font-weight: bold; color: brown;">:<br /></span> <span style="color: blue;"># Change Language:</span><br /> <span style="color: blue;"># (Supports: en, ua, ru, tr, no, pl, fr, de, ca, es, ko, vi, nl, is, pt, chs, cht, it, th, hi)</span><br /> - LANG=en<br /> <span style="color: blue;"># Required:</span><br /> <span style="color: blue;"># Change this to your host's public address</span><br /> - WG_HOST=your-ip-address<br /> <br /> <span style="color: blue;"># Optional:</span><br /> - PASSWORD_HASH=enter-your-password-hash-here<br /> <span style="color: blue;"># - PORT=51821</span><br /> <span style="color: blue;"># - WG_PORT=51820</span><br /> <span style="color: blue;"># - WG_CONFIG_PORT=92820</span><br /> <span style="color: blue;"># - WG_DEFAULT_ADDRESS=10.8.0.x</span><br /> <span style="color: blue;"># - WG_DEFAULT_DNS=1.1.1.1</span><br /> <span style="color: blue;"># - WG_MTU=1420</span><br /> <span style="color: blue;"># - WG_ALLOWED_IPS=192.168.15.0/24, 10.0.1.0/24</span><br /> <span style="color: blue;"># - WG_PERSISTENT_KEEPALIVE=25</span><br /> <span style="color: blue;"># - WG_PRE_UP=echo "Pre Up" > /etc/wireguard/pre-up.txt</span><br /> <span style="color: blue;"># - WG_POST_UP=echo "Post Up" > /etc/wireguard/post-up.txt</span><br /> <span style="color: blue;"># - WG_PRE_DOWN=echo "Pre Down" > /etc/wireguard/pre-down.txt</span><br /> <span style="color: blue;"># - WG_POST_DOWN=echo "Post Down" > /etc/wireguard/post-down.txt</span><br /> <span style="color: blue;"># - UI_TRAFFIC_STATS=true</span><br /> <span style="color: blue;"># - UI_CHART_TYPE=0 # (0 Charts disabled, 1 # Line chart, 2 # Area chart, 3 # Bar chart)</span><br /> <span style="color: blue;"># - WG_ENABLE_ONE_TIME_LINKS=true</span><br /> <span style="color: blue;"># - UI_ENABLE_SORT_CLIENTS=true</span><br /> <span style="color: blue;"># - WG_ENABLE_EXPIRES_TIME=true</span><br /> <span style="color: blue;"># - ENABLE_PROMETHEUS_METRICS=false</span><br /> <span style="color: blue;"># - PROMETHEUS_METRICS_PASSWORD=$$2a$$12$$vkvKpeEAHD78gasyawIod.1leBMKg8sBwKW.pQyNsq78bXV3INf2G # (needs double $$, hash of 'prometheus_password'; see "How_to_generate_an_bcrypt_hash.md" for generate the hash)</span><br /><span style="color: green;"><br /> image</span><span style="font-weight: bold; color: brown;">: </span>ghcr.io/wg-easy/wg-easy<span style="color: green;"><br /> container_name</span><span style="font-weight: bold; color: brown;">: </span>wg-easy<span style="color: #007F45;"><br /> volumes</span><span style="font-weight: bold; color: brown;">:<br /></span> - etc_wireguard:/etc/wireguard<span style="color: #007F45;"><br /> ports</span><span style="font-weight: bold; color: brown;">:<br /></span> - <span style="color: #CF00CF;">"51820:51820/udp"</span><br /> - <span style="color: #CF00CF;">"51821:51821/tcp"</span><span style="color: green;"><br /> restart</span><span style="font-weight: bold; color: brown;">: </span>unless-stopped<span style="color: #007F45;"><br /> cap_add</span><span style="font-weight: bold; color: brown;">:<br /></span> - NET_ADMIN<br /> - SYS_MODULE <span style="color: #007F45;"><br /> sysctls</span><span style="font-weight: bold; color: brown;">:<br /></span> - net.ipv4.ip_forward=1<br /> - net.ipv4.conf.<span style="font-weight: bold;">all</span>.src_valid_mark=1<br /><span style="color: #007F45;"><br />volumes</span><span style="font-weight: bold; color: brown;">:<br /></span> etc_wireguard:There are a few things you need to change in the docker-compose.yml file. The first thing is your IP address. Change the your-ip-address field with your server public IP address. You can locate your IP address by going to the site whatismyip.com
The second thing to change is the password hash. The password hash will provide a password login to the WireGuard admin UI. If you choose to ignore it, the admin UI page will be available to everyone.
Use the following command to generate the password hash:
<span style="color: #c20cb9; font-weight: bold;">docker</span> run <span style="color: #660033;">--rm</span> <span style="color: #660033;">-it</span> ghcr.io<span style="color: #000000; font-weight: bold;">/</span>wg-easy<span style="color: #000000; font-weight: bold;">/</span>wg-easy wgpw <span style="color: #ff0000;">'your-password'</span>For example, for the password “ilovewireguard”, the hash will be:
$ <span style="color: #c20cb9; font-weight: bold;">docker</span> run <span style="color: #660033;">--rm</span> <span style="color: #660033;">-it</span> ghcr.io<span style="color: #000000; font-weight: bold;">/</span>wg-easy<span style="color: #000000; font-weight: bold;">/</span>wg-easy wgpw <span style="color: #ff0000;">'ilovewireguard'</span><br /><span style="color: #007800;">PASSWORD_HASH</span>=<span style="color: #ff0000;">'$2a$12$YtRmaKSf2NpwwPuww3UJYuXCh9MMYQTQ3sC39Ut4sJsLEYfp.CRYi'</span>What you need to do next is to add “$” to every existing $ in the password hash, so it becomes like this:
$$2a$$12$$YtRmaKSf2NpwwPuww3UJYuXCh9MMYQTQ3sC39Ut4sJsLEYfp.CRYiThis will be your final password hash which you copy and paste to the docker-compose.yml file.
Lastly, save and close the text editor, then run:
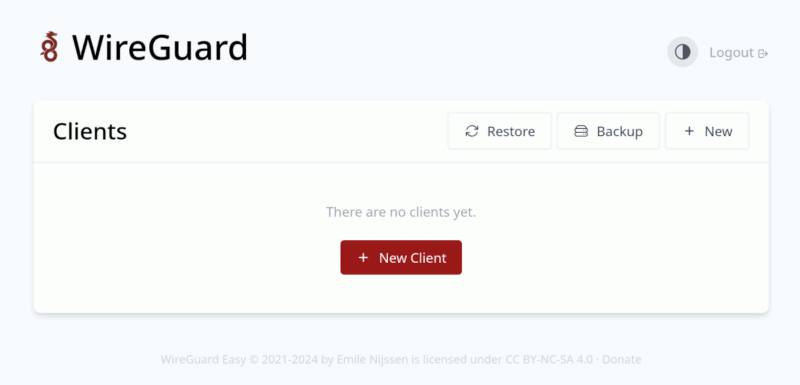
<span style="color: #c20cb9; font-weight: bold;">docker compose</span> up <span style="color: #660033;">-d</span>Next, go to the URL http://127.0.0.1:51821 and you will be able to access the admin UI.
Usage
With the installation of the WireGuard server, the next thing to do is to configure the client to connect to it.
WireGguard operates on a peer-to-peer basis, so you have to generate a keypair for every client.
In the WireGuard admin UI, click the “New Client” button.
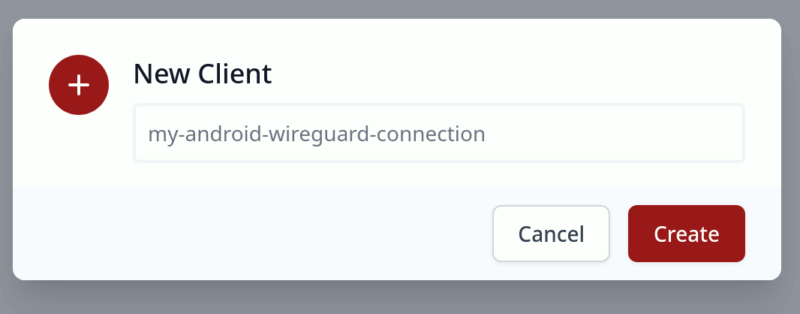
Enter a name for the client, and click “Create”.
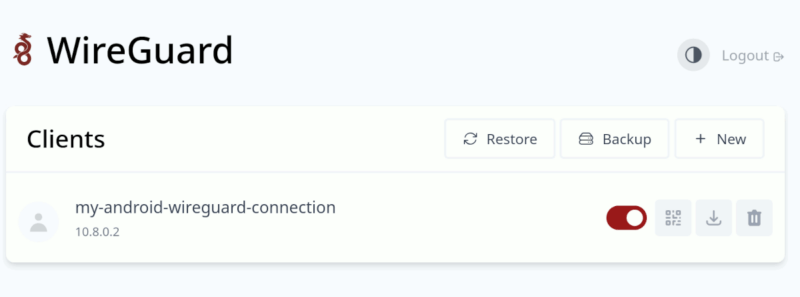
The new client will show up in the list. You can either click on the QR icon to display a QR code for you to scan, or download the config file to your client PC.
If you are planning to your WireGuard installation from your phone, download the WireGuard app from the Play Store or iOS store. Open it up, click the “+” button and select “Scan from QR code”.
For Linux PC, you can import the conf file using the command:
<span style="color: #c20cb9; font-weight: bold;">sudo</span> nmcli connection import <span style="color: #7a0874; font-weight: bold;">type</span> wireguard <span style="color: #c20cb9; font-weight: bold;">file</span> <span style="color: #000000; font-weight: bold;"><</span>conf-file<span style="color: #000000; font-weight: bold;">></span>Note: replace <conf-file> with the full file path to your WireGuard conf file.
You will then be able to connect from the Network Manager interface.
Potential Issues
The thing about WireGuard is that it requires a static IP address for it to connect to. This might be an issue for those ISPs that are issuing dynamic IP addresses to residential users. One solution is to use a Dynamic DNS (DDNS) hostname so WireGuard is always pointing to the same address, even though the IP address behind it is constantly changing.
For ISPs that are using CG-NAT, WireGuard won’t work at all, since there is no way for it to reach the server behind the NAT. One solution is to subscribe to a VPS with a static IP address.
Final Thoughts
As you can see, it is very easy to install and set up WireGuard on your homelab. It is very useful when I am overseas, and I need a secure network to do my work. I strongly recommend installing and using WireGuard, particularly when you need an easy way to access a secure network for free.
Be the first to comment! Get the discussion going.