We have previously shown you how to use Cloudflare Tunnel to connect to your homelab apps. If you are not a fan of Cloudflare, Tailscale is yet another tool you can use to connect remotely to your app. Tailscale is built on top of WireGuard, and allows you to create and manage virtual private networks (VPNs) over the internet. This makes it great for you to access your apps outside your network.
In this article, I will go through the process of installing and setting up a Tailscale network for accessing your homelab services.
Prerequisites
Before you start, make sure that you have the following ready:
- A Linux homelab server, preferably running Debian or Ubuntu
- A client machine running a graphical desktop environment
- A reliable internet connection and SSH access to your homelab server
Installing Tailscale
The most common approach to install Tailscale on your homelab is via its official repository. This gives you total control over your homelab, which can be useful if you want to access your server remotely.
Run the following command to download and run the Tailscale installation script on your homelab:
curl -fsSL https://tailscale.com/install.sh | shStart the Tailscale daemon on your homelab machine:
sudo tailscale upDoing this will print a link on your server’s console. Copy this link,
then open it on a web browser.
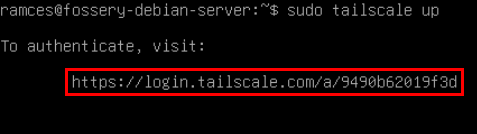
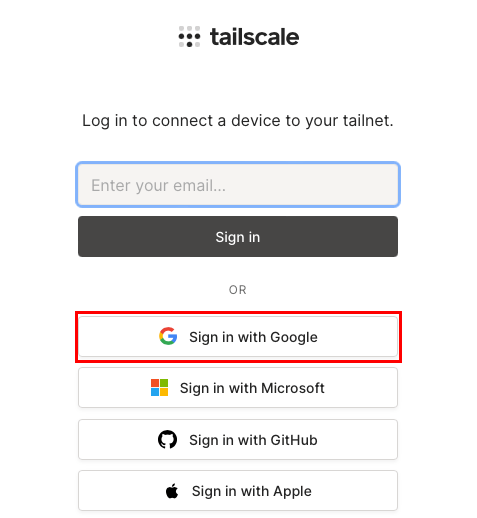
It will prompt you to login (or create an account) to Tailscale.
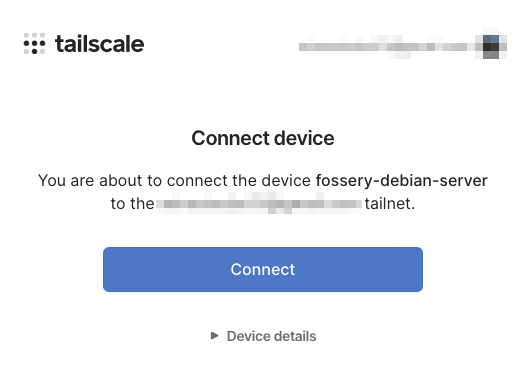
Once done, Tailscale will prompt you to link your homelab server to
your VPN. Click “Connect” to add it to your Tailscale network.
Back in the terminal, start systemd-resolved:
sudo systemctl enable --now systemd-resolved.serviceRemove your server’s “resolv.conf” file, then replace it with a symbolic
link running Systemd’s own resolve file:
sudo rm /etc/resolv.conf
sudo ln -s /run/systemd/resolve/stub-resolv.conf /etc/resolv.conf
Reload both Systemd’s DNS backend and your Tailscale daemon to apply
your new settings:
sudo systemctl restart systemd-resolved.service
sudo systemctl restart NetworkManager.service
sudo systemctl restart tailscaled.service
Connecting A Client to Your Tailscale Network
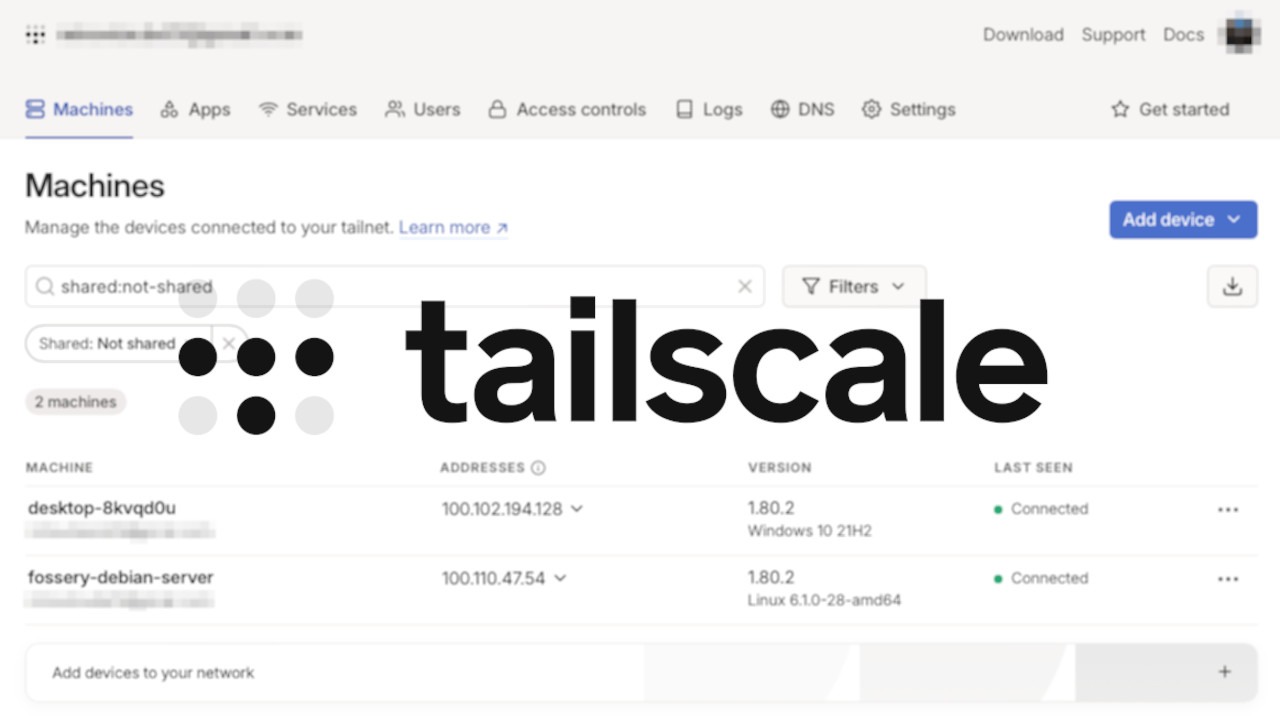
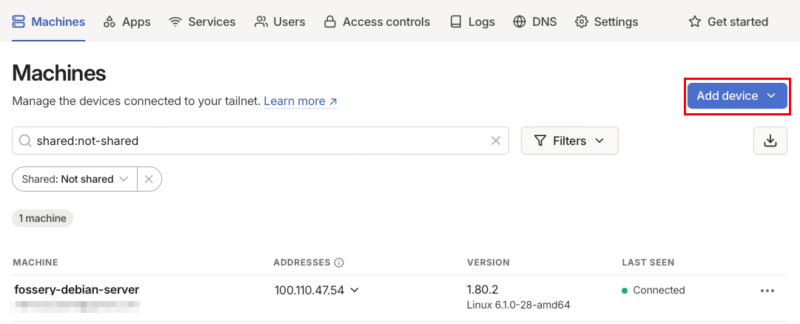
With your homelab properly enrolled to your Tailscale network, you can now expand it to your other clients. To do that, start by logging in to your Tailscale admin page.
Click the Add device button on the page’s upper right corner.
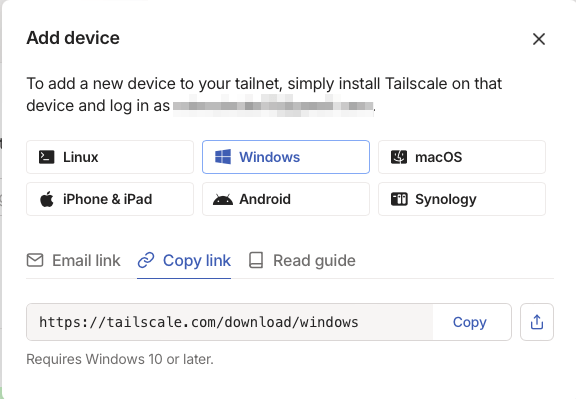
This will bring up a small popup menu showing the different platforms that you can install Tailscale on. For this guide, I will install Tailscale on my Windows machine.
Note: if you’re installing it on a different OS, the menu provides an install note for each platform under the Read guide tab.
Click the Copy link tab on the popup window, then open the link on a new web browser tab.
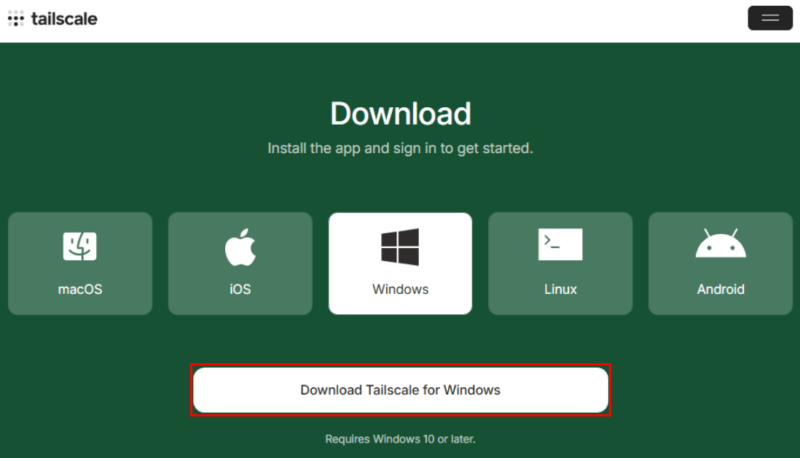
Click Download Tailscale for Windows, then run the Tailscale executable file on your Downloads folder to install it on your client.
Select Get Started, then Sign in to your network.
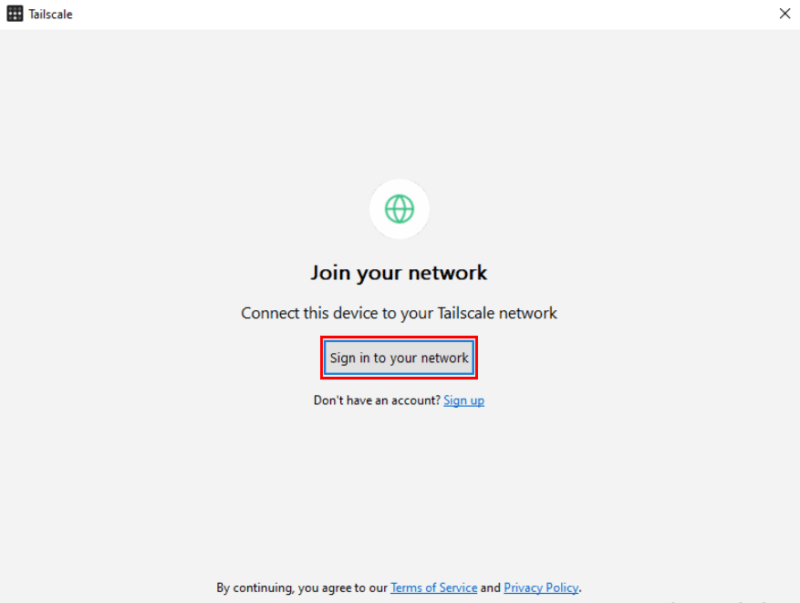
Login to your Tailscale account to finish the linking process.
Exposing Homelab Services to Tailscale
At this point, you now have a working Tailscale network between your
homelab server and a client device. To access your apps through
Tailscale, you need to enable and create a “serve” proxy on your
server.
Start by checking the port number of the homelab service that you want
to expose:
docker ps --format "{{.Names}}: {{.Ports}}"
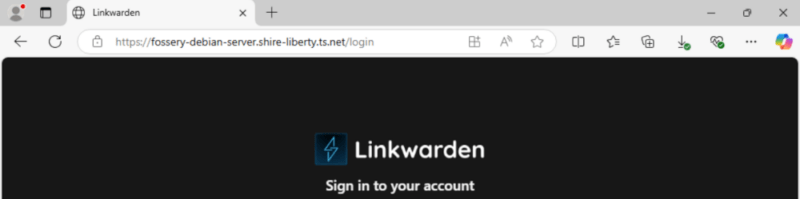
For example, if I want to access my Linkwarden server’s web dashboard
through Tailscale, I would need to expose port 3000.
Run the following command to create a Tailscale server proxy. This
will generate the TLS certificates to secure your homelab service and
start the proxy on the background:
sudo tailscale serve --bg --https=443 3000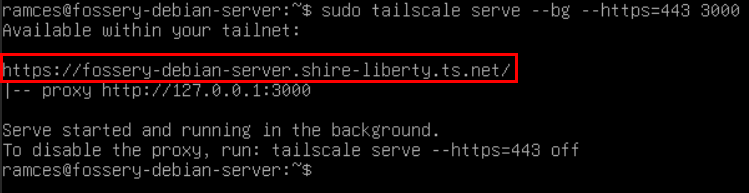
Note: you can also expose other services simultaneously by changing
the value of the --https flag.
You can now test it by opening the address in the console’s output on a web browser.
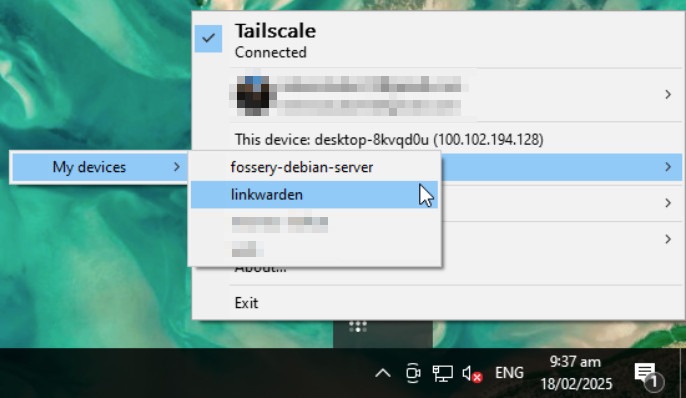
Alternatively, you can check the list of all your Tailscale services by clicking the Tailscale icon on your desktop’s sidebar, then selecting “Network Devices.”
Wrapping Up
Tailscale is a powerful VPN service that fundamentally changes how you connect and interact with your homelab. It’s reliable, reasonably secure, and comes with a lot of features beyond exposing individual homelab services. Personally, I use Tailscale as the bedrock of my homelab, giving me access to my network wherever I am in the world.
Image credit: Wikimedia Commons (Logo). All alterations and screenshots by Ramces Red.
Be the first to comment! Get the discussion going.