
While you can install plenty of applications on your homelab server, one of the limitation is that they are only accessible on your home network. While there are many ways to expose your apps and services to the outside world, one of the more secure way is to use Cloudflare Tunnel to access your apps and services. Here we show you how to set up Cloudflare Tunnel on your homelab server.
What is CloudFlare Tunnel?
The traditional way to expose your applications to the Internet is to enable port-forwarding on your router. This method requires you to configure your router to accept incoming connections and forward the traffic to the internal IP address of your homelab. In addition, you also need to know your home network’s public IP address in order to access your apps. This can be a challenge, as most ISPs don’t provide a dedicated IP address for residential usage. In addition, if your ISP are using CGNAT (Carrier-grade NAT), then the port-forwarding method will fail totally.
Cloudflare tunnel is a tunneling solution that connect your device to Cloudflare’s network. Once a tunnel is created, Cloudflare can connect to your applications securely without requiring a publicly routable IP address.
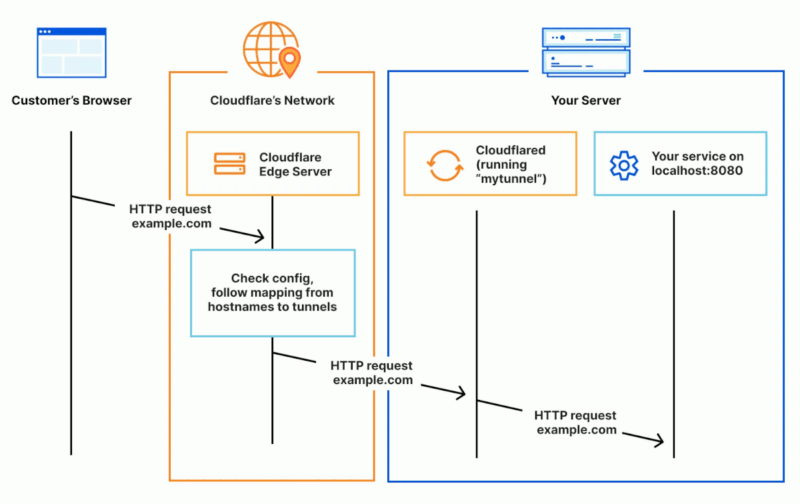
With Cloudflare Tunnel, your home’s IP address and the device’s ports are not exposed to the outside world, so your homelab will remain anonymous to the Internet.
Requirement
Before you set up Cloudflare Tunnel, you need to have the following in place:
- You have a Cloudflare account (it is free)
- You own a domain name (if you don’t have, you can get one from NameCheap)
- You have superuser permission to install applications and set up tunneling on your homelab
Note: This tutorial assumes that you are running Linux as the homelab OS. If you are using Windows, this is not for you.
Migrate Your Domain Name to Cloudflare
For Cloudflare Tunnel to work, you need to have a domain name hosted in Cloudflare.
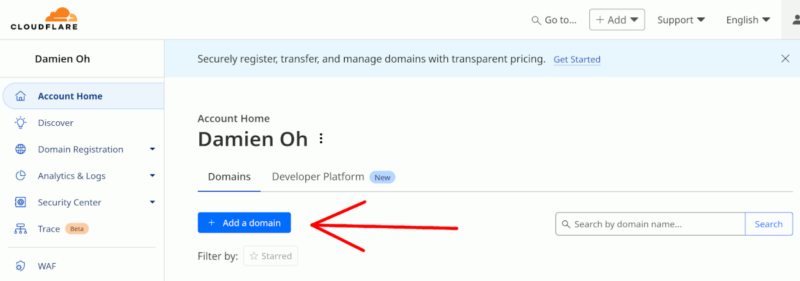
- Login to Cloudflare and click “Add a domain”.
- Enter your domain name and press “Continue”.
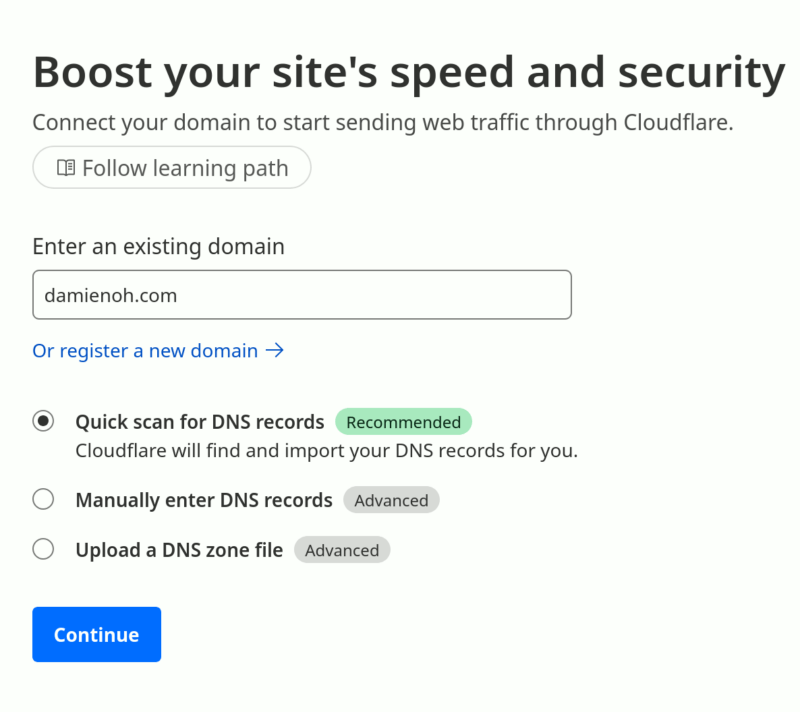
- When it comes to selecting a plan for your domain, you can select the “Free” option.
- Cloudflare will scan your domain existing DNS records and import them over. Check the DNS records to see if they are correct. If yes, click “Continue to activation”.
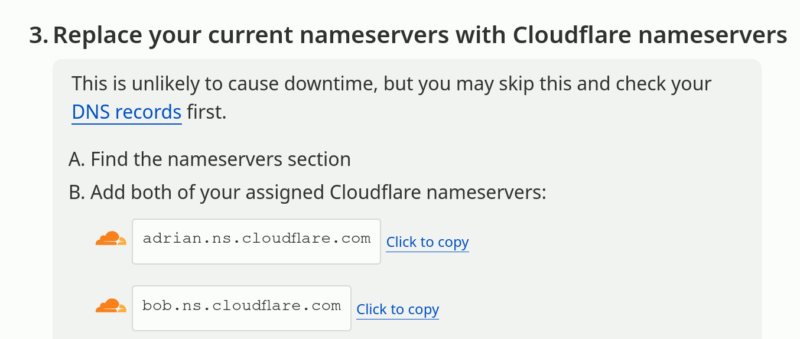
- Lastly, login to your domain registrar to change the nameserver to point to Cloudflare’s nameservers.
Once you have migrated your domain name to Cloudflare, it might take up to 24 hours for it to be activated.
Create a Cloudflare Tunnel
With the domain name set up, you can proceed to create a Cloudflare tunnel.
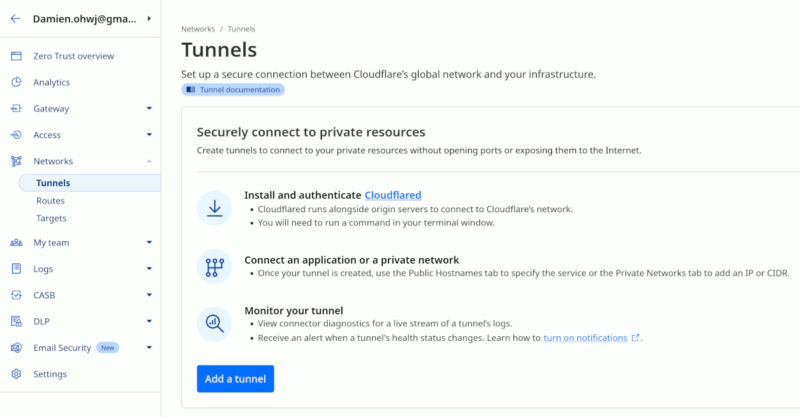
- Click “Zero Trust” on the side menu. (if it asks you to create a team name or make payment, simply click “Cancel and exit”, then click “Zero Trust” again).
- Click Tunnel under the Network submenu.
- Click “Add a tunnel”
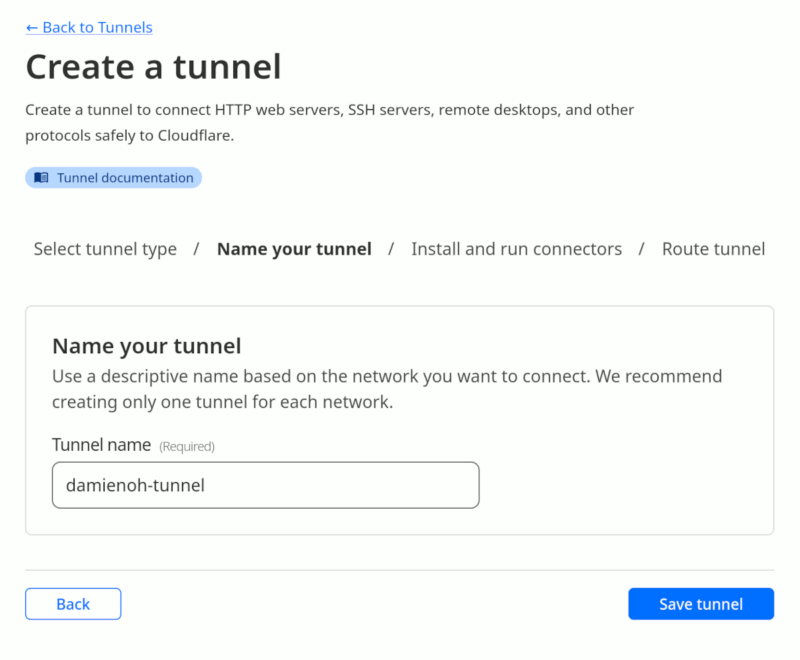
- Select the “Cloudflared” option.

- Enter a name for your tunnel, then click “Save tunnel”.
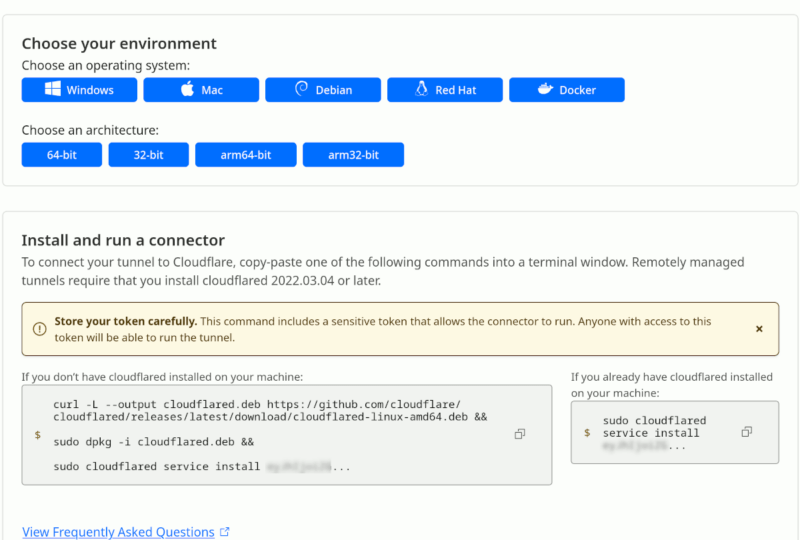
- Select your homelab OS environment and copy and paste the commands into your homelab terminal. This will install
cloudflaredand set up the tunneling. Once it is done, you should see the “Connected” message.
That’s it. You have created the tunnel.
Accessing Your Applications
With your Cloudflare Tunnel set up, it is time to configure the tunnel to connect to your applications.
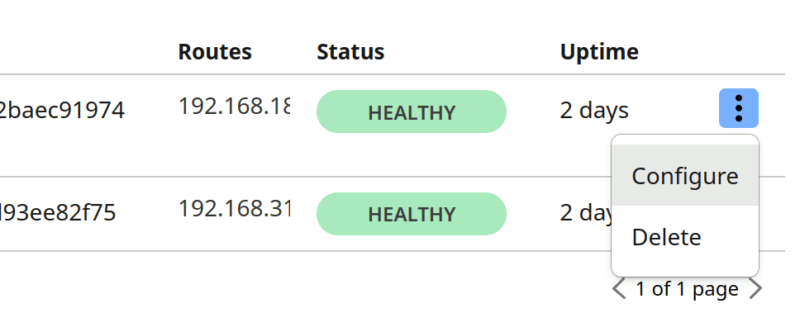
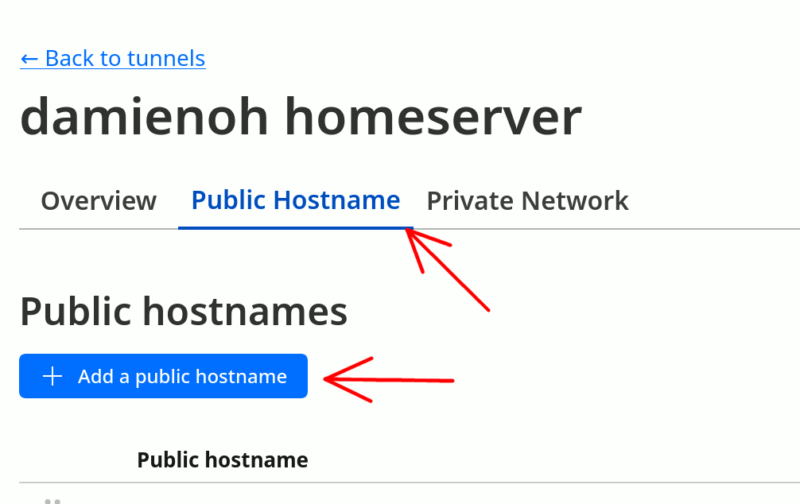
In Cloudflare, go to Zero Trust -> Network -> Tunnel. You should see your connected tunnel. Click the three dot button at the end and select “Configure”.
Move to the “Public Hostname” tab and click “Add a public hostname”
You can add a subdomain that hasn’t been used before. Choose the domain that you have previously added.
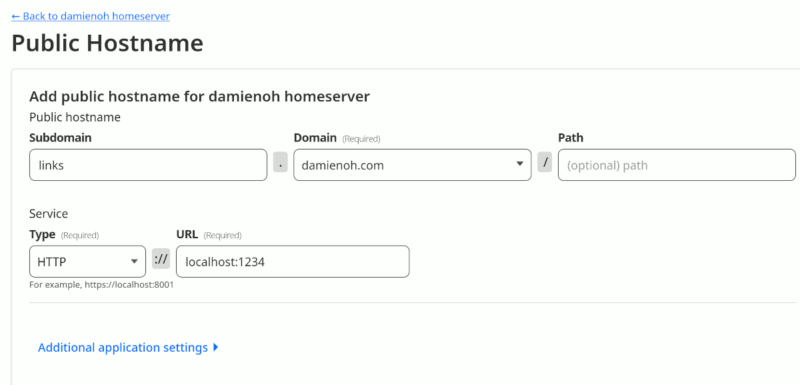
In the Service section, select HTTP for the Type. Use localhost:port for the URL. Change the “port” to the port your application is using.
In my case, I am creating a subdomain to connect to my Linkwarden setup.
Click “Save Hostname”. In a few minutes, you will be able to access your application using the subdomain URL you created.
Accessing SSH using Cloudflare Tunnel
In addition to your applications, you can also configure SSH access to your homelab.
Same as above, create a subdomain. For the service, use the “SSH” type instead.
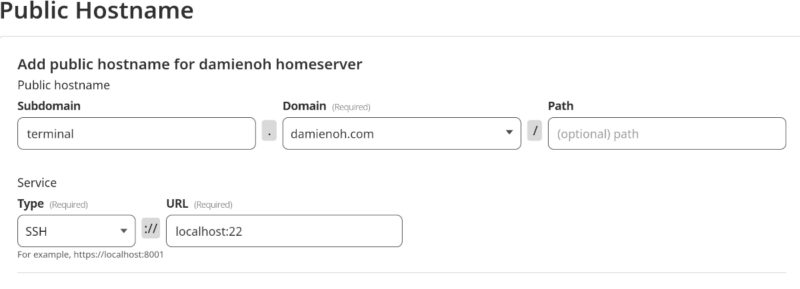
Note: 22 is the default SSH port. If you have changed it, make sure you update it accordingly.
On your client PC where you want to connect via SSH to your homelab, you need to first install cloudflared, then use the ssh command with ProxyCommand flag, something like this:
<span style="color: #c20cb9; font-weight: bold;">ssh</span> damien<span style="color: #000000; font-weight: bold;">@</span>terminal.damienoh.com <span style="color: #660033;">-o</span> <span style="color: #007800;">ProxyCommand</span>=<span style="color: #ff0000;">"/usr/bin/cloudflared access ssh --hostname %h"</span>Wrapping Up
Cloudflare Tunnel provides a free and easy way to make your applications publicly accessible. It is secure too as it doesn’t expose your homelab public IP address or ports. One limitation of the Cloudflare tunnel is that it has a 100mb upload limit. This should be fine in most cases, unless you are running a file server (like Nextcloud), and you need to back up files bigger than 100mb.
Be the first to comment! Get the discussion going.