The beauty of a homelab server is that you can securely connect to it wherever you are. However, for that to happen, you need to set up SSH (Secure Shell) on your homelab for remote access. SSH only allows authenticated login and provides encrypted communication. This ensures that your login credentials and commands remain safe from eavesdropping. Here we show you how to set up SSH on your homelab for secure remote access.
Prerequisites
Before getting started, ensure you have the following:
- A homelab server running Linux (Ubuntu, Debian, Arch Linux or any other distribution)
- Another computer with a SSH client installed
- A stable network connection
Install SSH Server
You need a SSH server for SSH to work. Most Linux distributions come with OpenSSH server pre-installed, but if your homelab doesn’t come with it, you can install it manually:
For Ubuntu/Debian:
<span style="color: #c20cb9; font-weight: bold;">sudo</span> apt update <span style="color: #000000; font-weight: bold;">&&</span> <span style="color: #c20cb9; font-weight: bold;">sudo</span> apt <span style="color: #c20cb9; font-weight: bold;">install</span> openssh-server <span style="color: #660033;">-y</span>For Fedora/CentOS/RHEL:
<span style="color: #c20cb9; font-weight: bold;">sudo</span> <span style="color: #c20cb9; font-weight: bold;">yum install</span> openssh-server <span style="color: #660033;">-y</span>For Arch Linux:
<span style="color: #c20cb9; font-weight: bold;">sudo</span> pacman <span style="color: #660033;">-S</span> opensshOnce installed, enable and start the SSH service:
<span style="color: #c20cb9; font-weight: bold;">sudo</span> systemctl <span style="color: #7a0874; font-weight: bold;">enable</span> <span style="color: #c20cb9; font-weight: bold;">ssh</span><br /><span style="color: #c20cb9; font-weight: bold;">sudo</span> systemctl start <span style="color: #c20cb9; font-weight: bold;">ssh</span>To verify that SSH is running:
<span style="color: #c20cb9; font-weight: bold;">sudo</span> systemctl status <span style="color: #c20cb9; font-weight: bold;">ssh</span>With the SSH server up and running, you can now access your homelab from another PC using the command:
<span style="color: #c20cb9; font-weight: bold;">ssh</span> username<span style="color: #000000; font-weight: bold;">@</span>homelab_ip_addrYou will be prompted to enter your password. Once that is verified, you will be logged in to your homelab remotely.
Set Up SSH Key Authentication
By default, SSH uses password authentication to log you in, which is not secure as your password is sent in plain text and can be easily sniffed by a Man-in-the-Middle attack. Hackers can also do a brute force password attack to gain entry to your server.
Instead, you should set up a key-based authentication for SSH. It is like installing a lock on your SSH server – without the right key, no one can access your server.
Generate SSH key pair on the client machine
On the client PC that you are using to access your homelab, enter the following command to generate a SSH key pair:
<span style="color: #c20cb9; font-weight: bold;">ssh-keygen</span> <span style="color: #660033;">-t</span> ed25519Note: we are using ed25519 instead of the usual rsa because “ed25519” is faster, smaller and more secure.
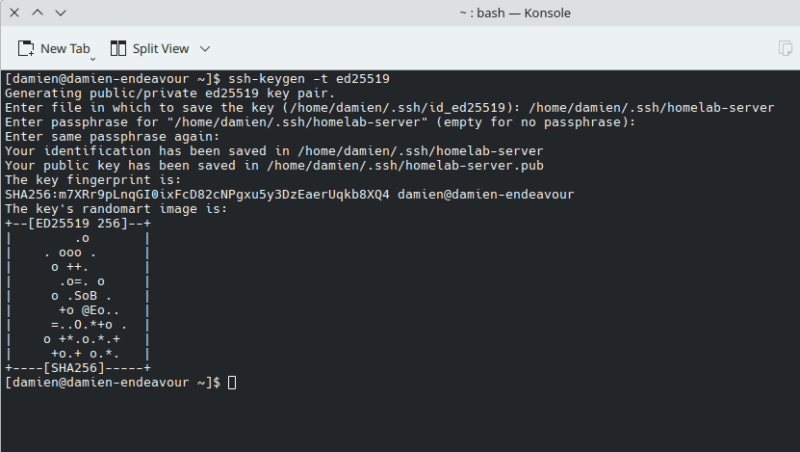
It will prompt you to enter the file (name and path) to save the key to. You can press Enter to select the default, or enter the file path and name and press Enter.
You can set a passphrase for additional security, but it is optional.
Once it is done, you will find two files in your “.ssh” folder, in this case, “homelab-server” and “homelab-server.pub”.
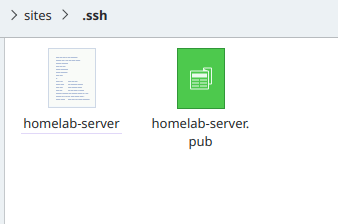
The “homelab-server.pub” file is the public key and you need to upload it to your homelab.
The “homelab-server” file is the private key used to authenticate your login.
Copy the public key to homelab server
Still on the client PC, enter the following command to copy the public key to your homelab:
ssh-copy-id <span style="color: #660033;">-i</span> public-key-filename your_username<span style="color: #000000; font-weight: bold;">@</span>your_server_ipIn my case, it will be:
ssh-copy-id <span style="color: #660033;">-i</span> ~<span style="color: #000000; font-weight: bold;">/</span>.ssh<span style="color: #000000; font-weight: bold;">/</span>homelab-server.pub damien<span style="color: #000000; font-weight: bold;">@</span>homelab_ip_addrIf that doesn’t work, either because the ssh-copy-id command is not available or for any other error, use this command instead:
<span style="color: #c20cb9; font-weight: bold;">cat</span> ~<span style="color: #000000; font-weight: bold;">/</span>.ssh<span style="color: #000000; font-weight: bold;">/</span>homelab-server.pub <span style="color: #000000; font-weight: bold;">|</span> <span style="color: #c20cb9; font-weight: bold;">ssh</span> your_username<span style="color: #000000; font-weight: bold;">@</span>homelab_ip_addr <span style="color: #ff0000;">'mkdir -p ~/.ssh && cat >> ~/.ssh/authorized_keys'</span>When that is done, you can now log in to your homelab using the command:
<span style="color: #c20cb9; font-weight: bold;">ssh</span> username<span style="color: #000000; font-weight: bold;">@</span>homelab_ip_addrSecure SSH
Now that you have set up key-based authentication, you should take extra steps to secure SSH and prevent unauthorized access.
All the configuration options are found in the “/etc/ssh/sshd_config” file, so that is what we are going to edit.
Open the SSH configuration file with a text editor:
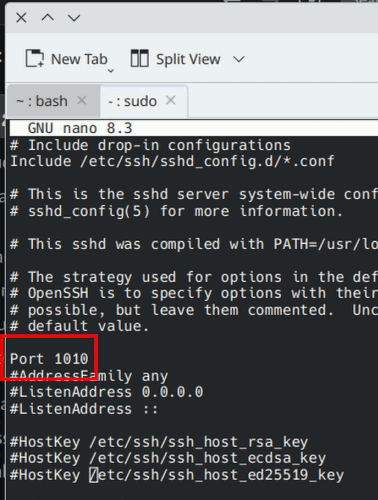
<span style="color: #c20cb9; font-weight: bold;">sudo</span> <span style="color: #c20cb9; font-weight: bold;">nano</span> <span style="color: #000000; font-weight: bold;">/</span>etc<span style="color: #000000; font-weight: bold;">/</span>ssh<span style="color: #000000; font-weight: bold;">/</span>sshd_configChange the default port
The default SSH is 22, but you can change it to another port to hide your ssh presence.
Scroll down the configuration file till you find the line:
<span style="color: #666666;"># </span>Port <span style="color: #000000;">22</span>Remove the “#” and change the “22” to another port, say “1010”
Disable root login
A root user has all the rights and permissions to destroy the server, so you want to prevent a root user for logging in at all.
Scroll down the file until you want the line:
<span style="color: #666666;">#</span>PermitRootLoginRemove the “#” and change it to:
PermitRootLogin noIn addition, add a new line:
AllowUsers usernameThis will only allow specific user(s) to log in to your homelab.
Disable password authentication
Password authentication is insecure, so you should disable it as a login method.
Find the line:
<span style="color: #666666; font-style: italic;">#PasswordAuthentication yes</span><br /><span style="color: #666666; font-style: italic;">#PermitEmptyPasswords no</span><br /><span style="color: #666666; font-style: italic;">#UsePAM no</span>Remove the “#” and change it to:
PasswordAuthentication no<br />PermitEmptyPasswords no<br />UsePAM noLastly, save the changes (Ctrl + O) and exit the editor (Ctrl + X).
Restart the SSH service to apply changes:
<span style="color: #c20cb9; font-weight: bold;">sudo</span> systemctl restart <span style="color: #c20cb9; font-weight: bold;">ssh</span>With this newly updated SSH configuration, you now have to specify the port to be able to log in:
<span style="color: #c20cb9; font-weight: bold;">ssh</span> <span style="color: #660033;">-p</span> <span style="color: #000000;">1010</span> username<span style="color: #000000; font-weight: bold;">@</span>homelab_ip_addrWhat’s Next
Now that you’ve set up SSH for secure remote access to your homelab server, you can proceed to install docker on your server so you can start installing free and open-source apps.
Be the first to comment! Get the discussion going.